Altanative using IO extender boards:
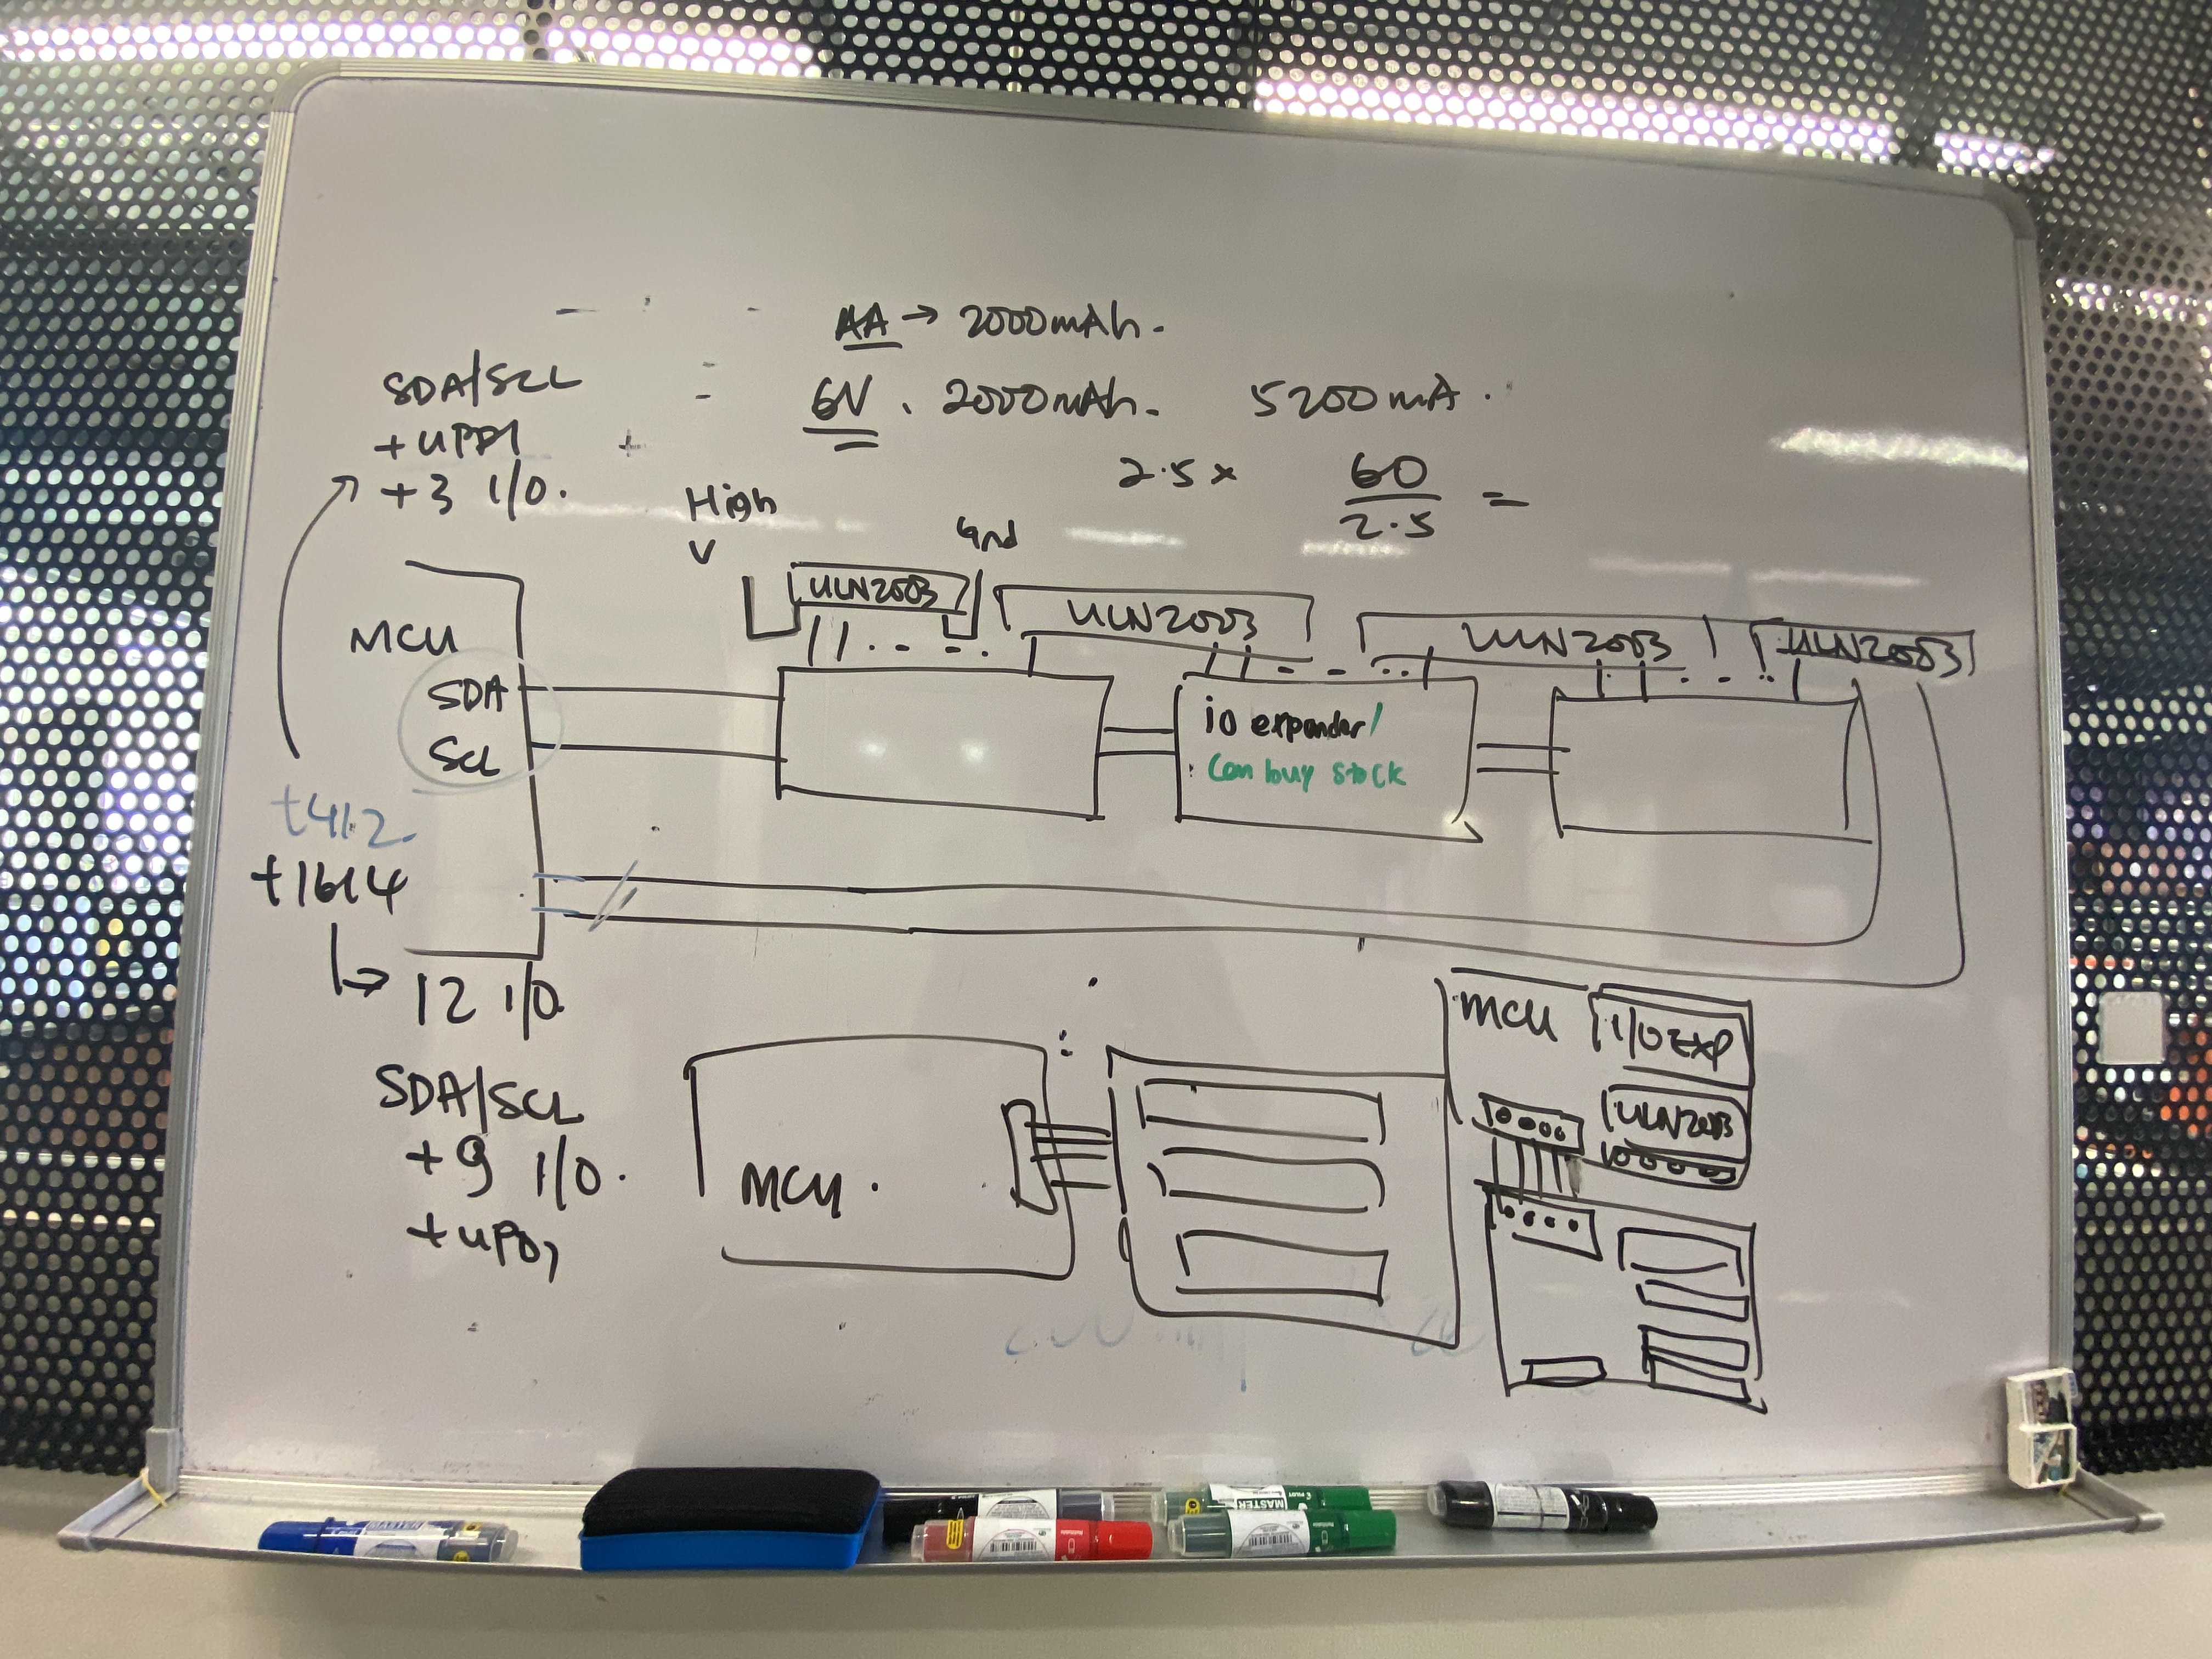
Using Darlington Pair:
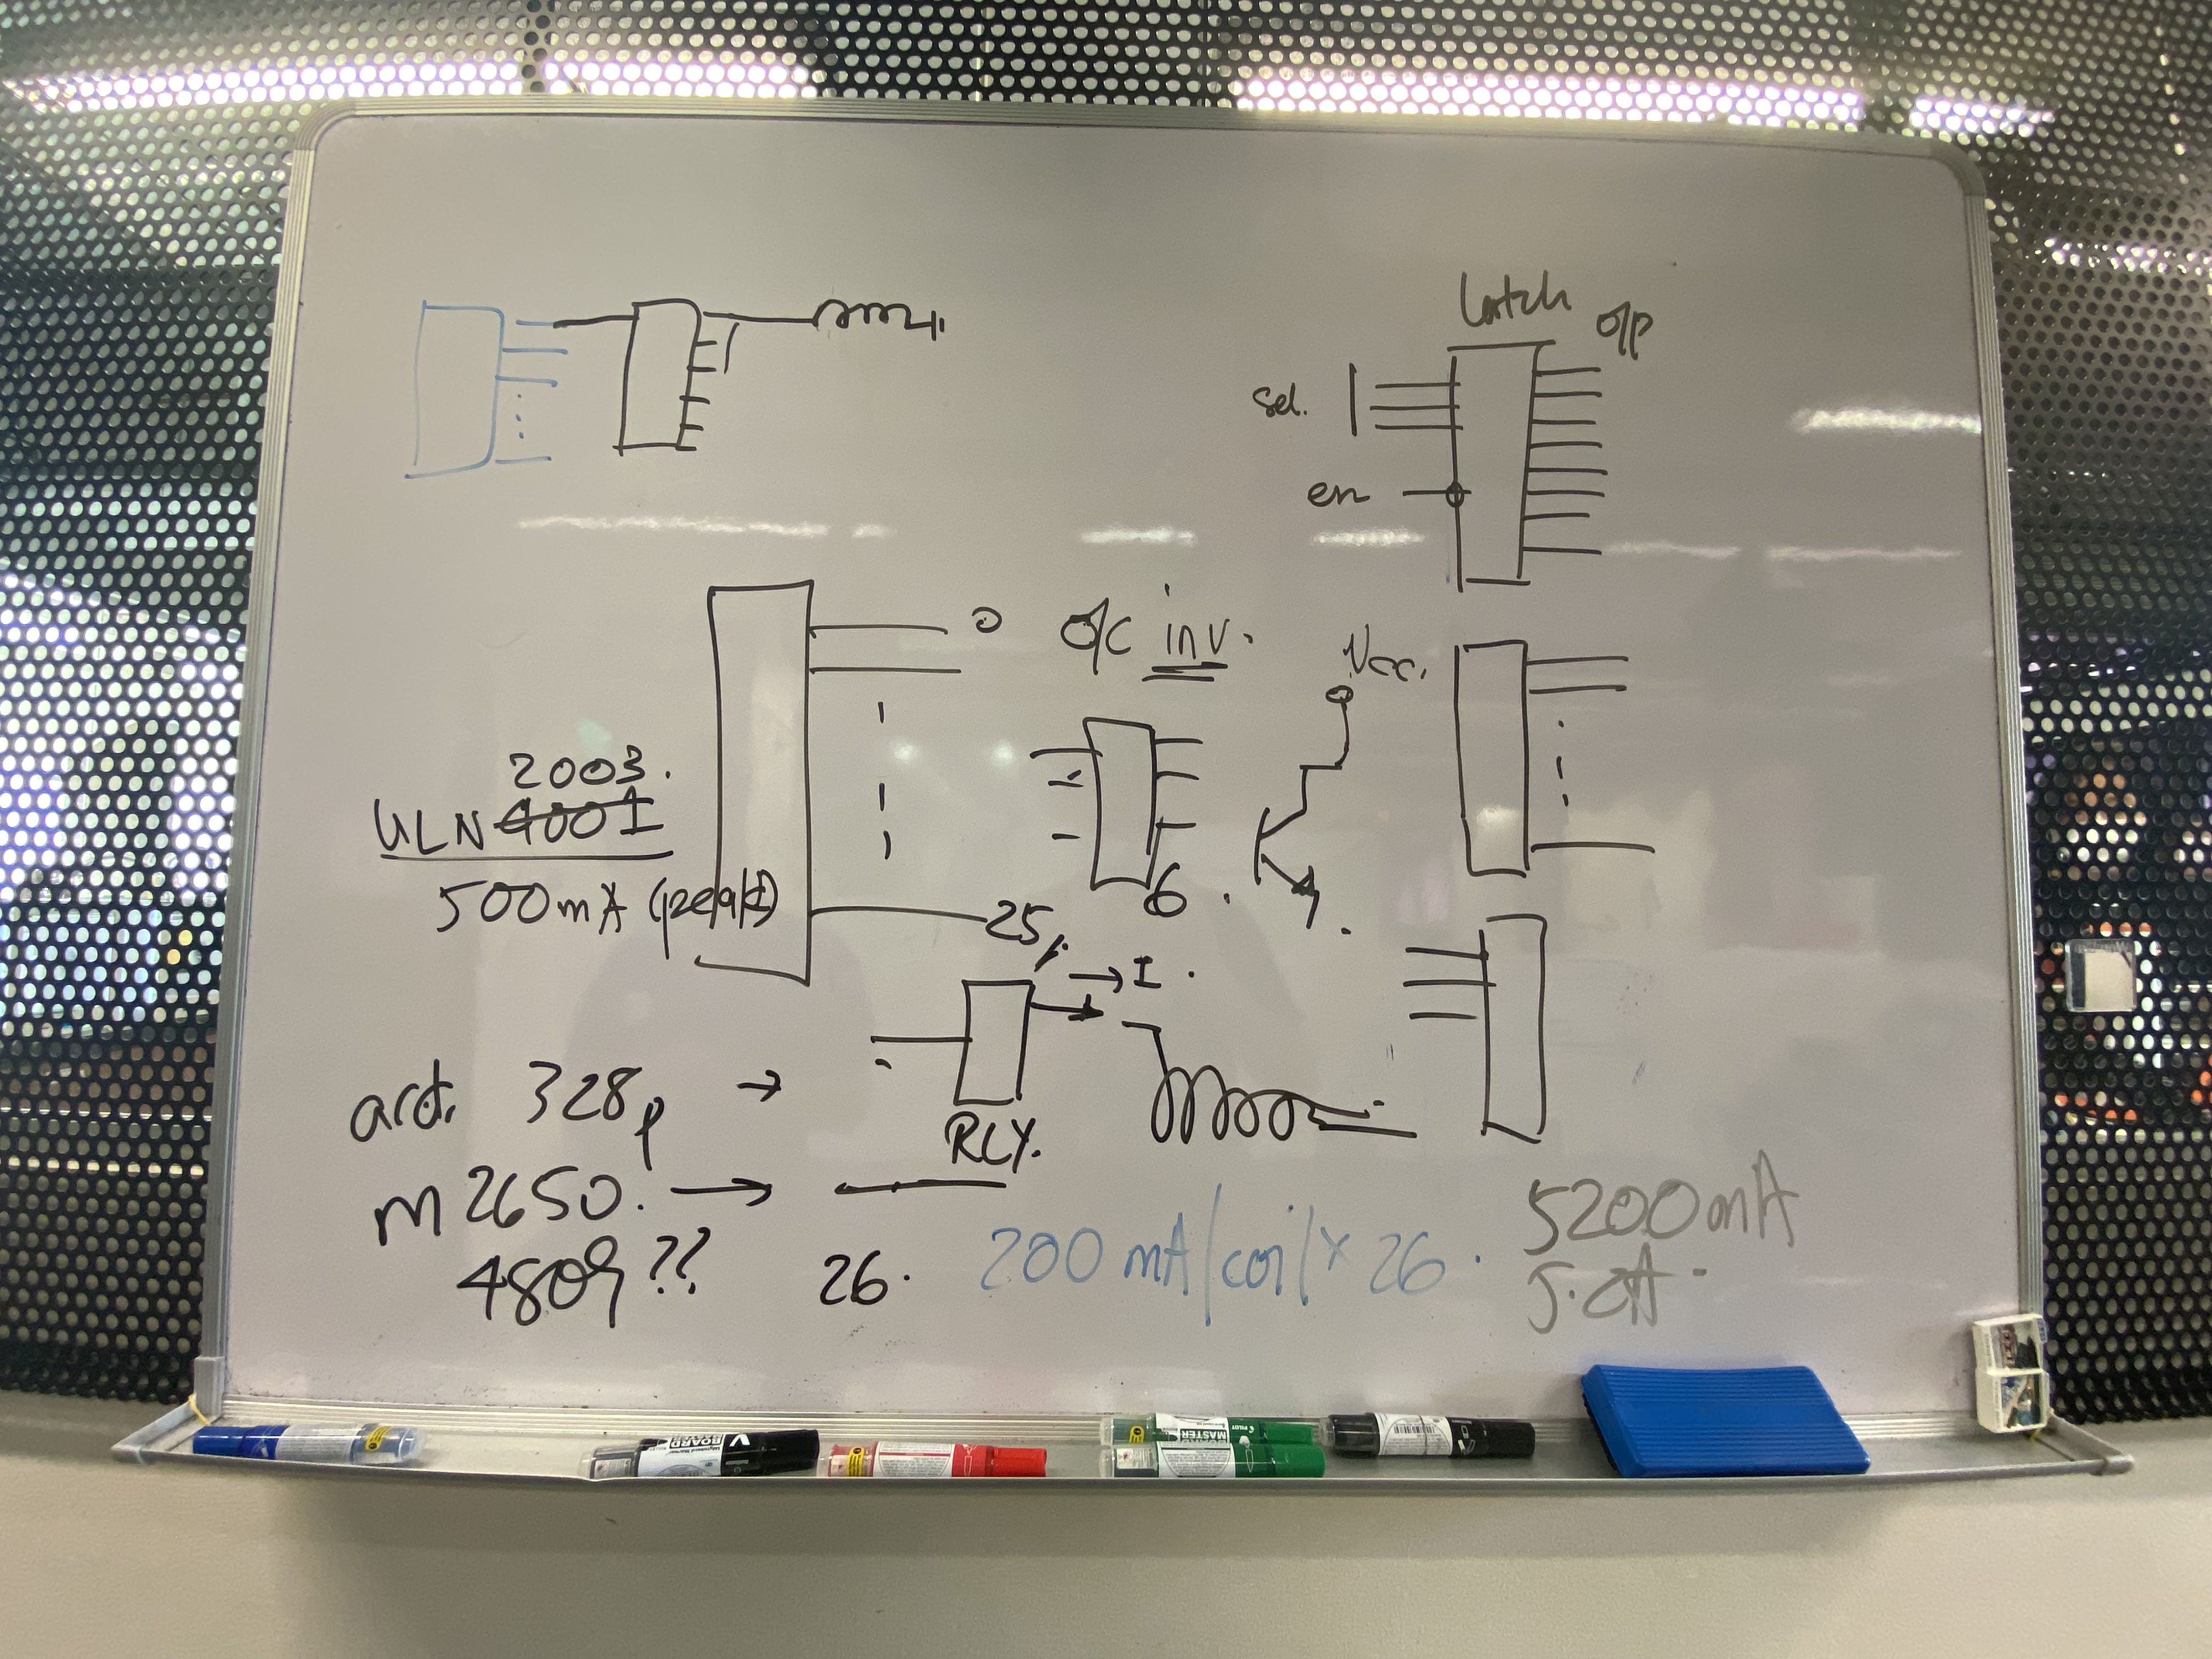
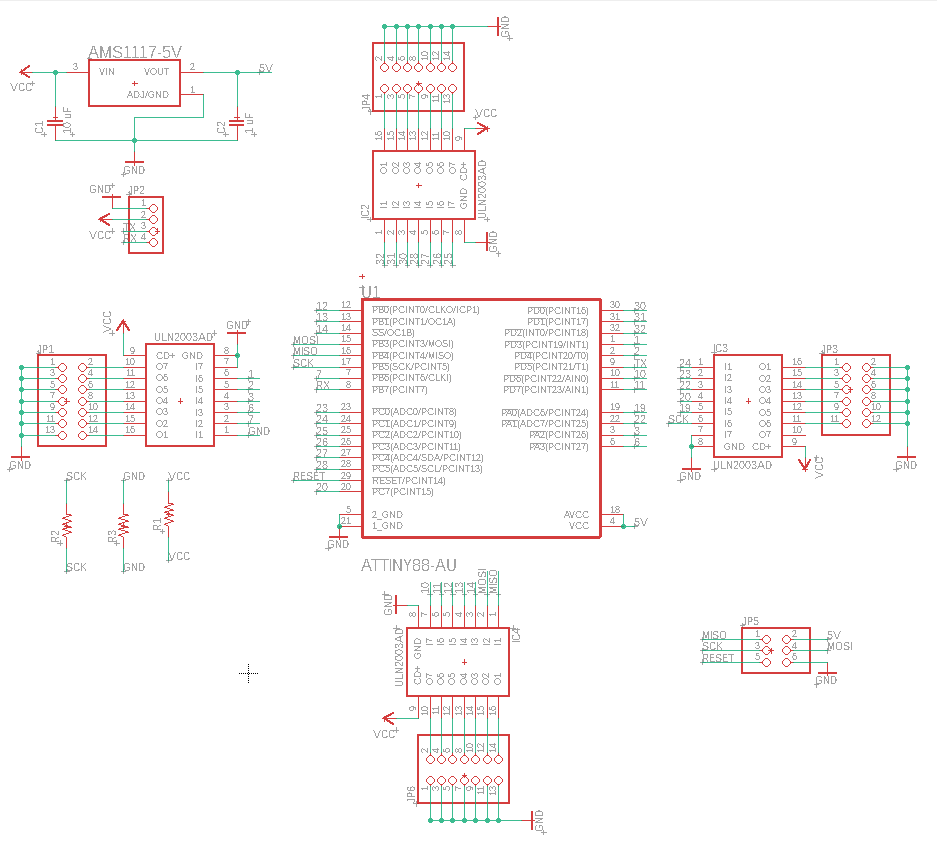
For the electronics of this project, I have opted to use the ATTINY88, with the ULN2003N Darlington pair to drive a solenoid, at 6VDC and 300mA per solenoid. An external 12V powersupply would pass current into the 5V voltage regulator to run power into the chip and the solenoids.
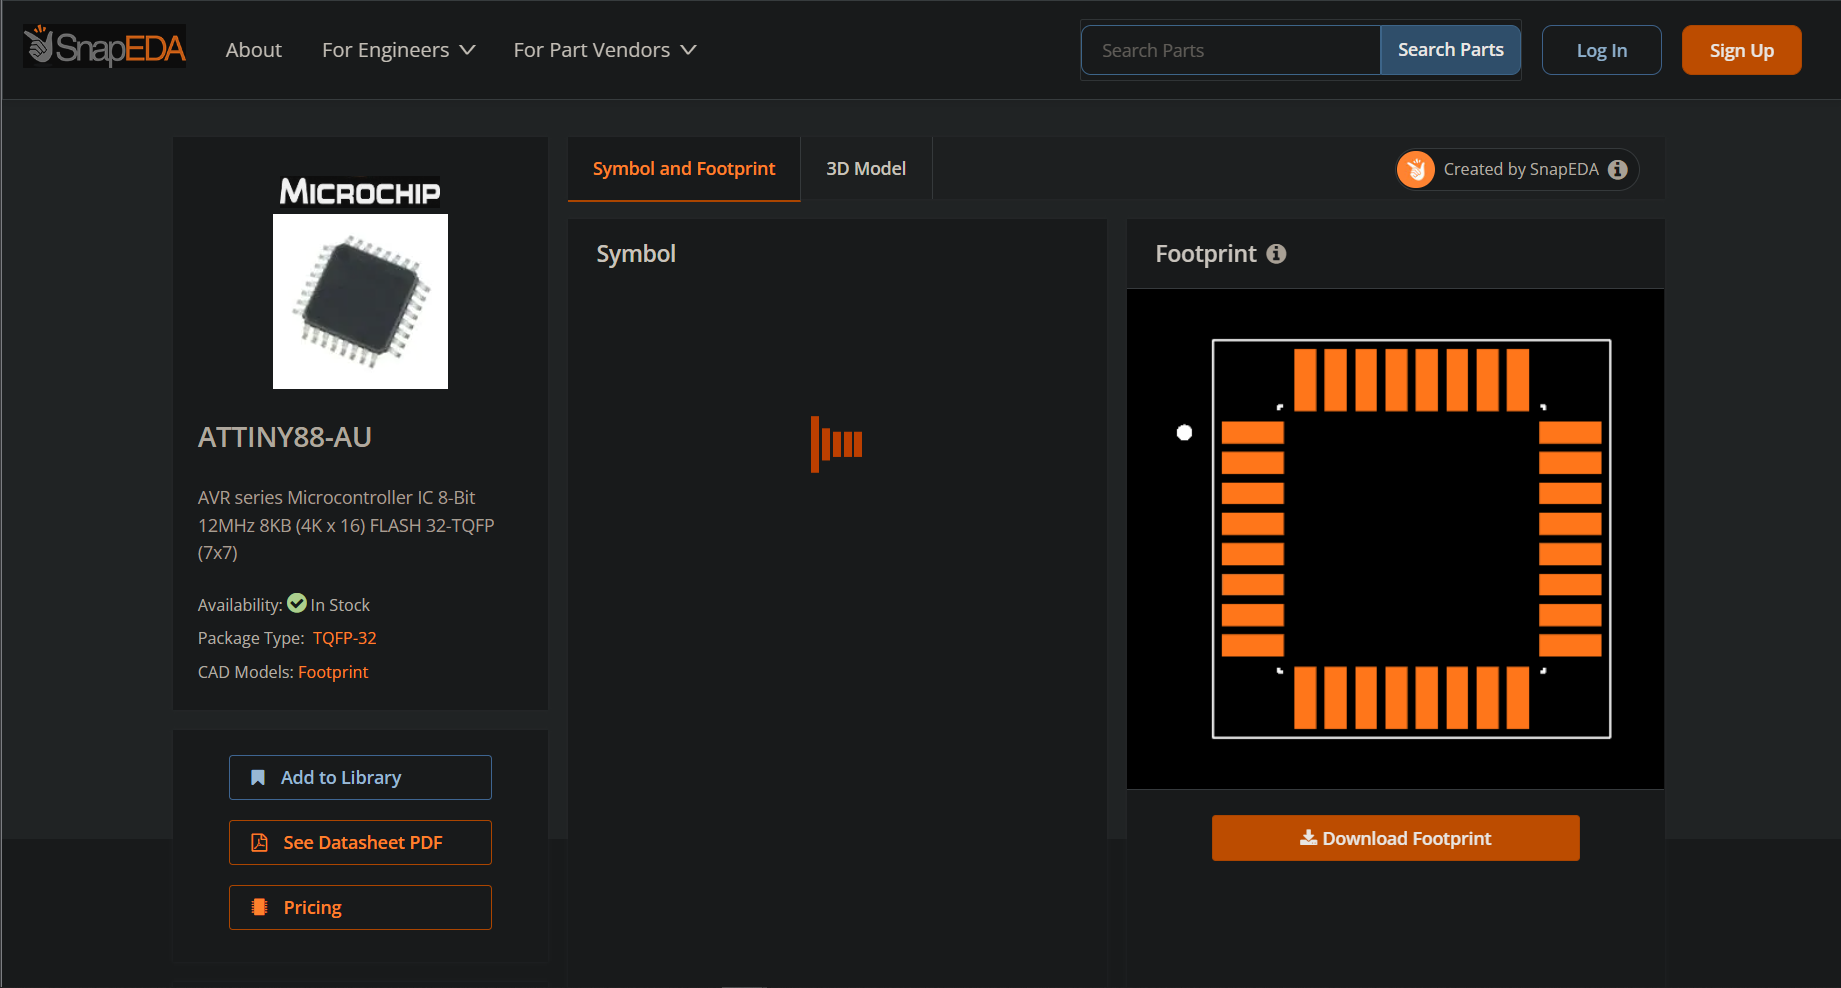
To start, I had found the footprint for the ATtiny 88 eagle in Snapeda.
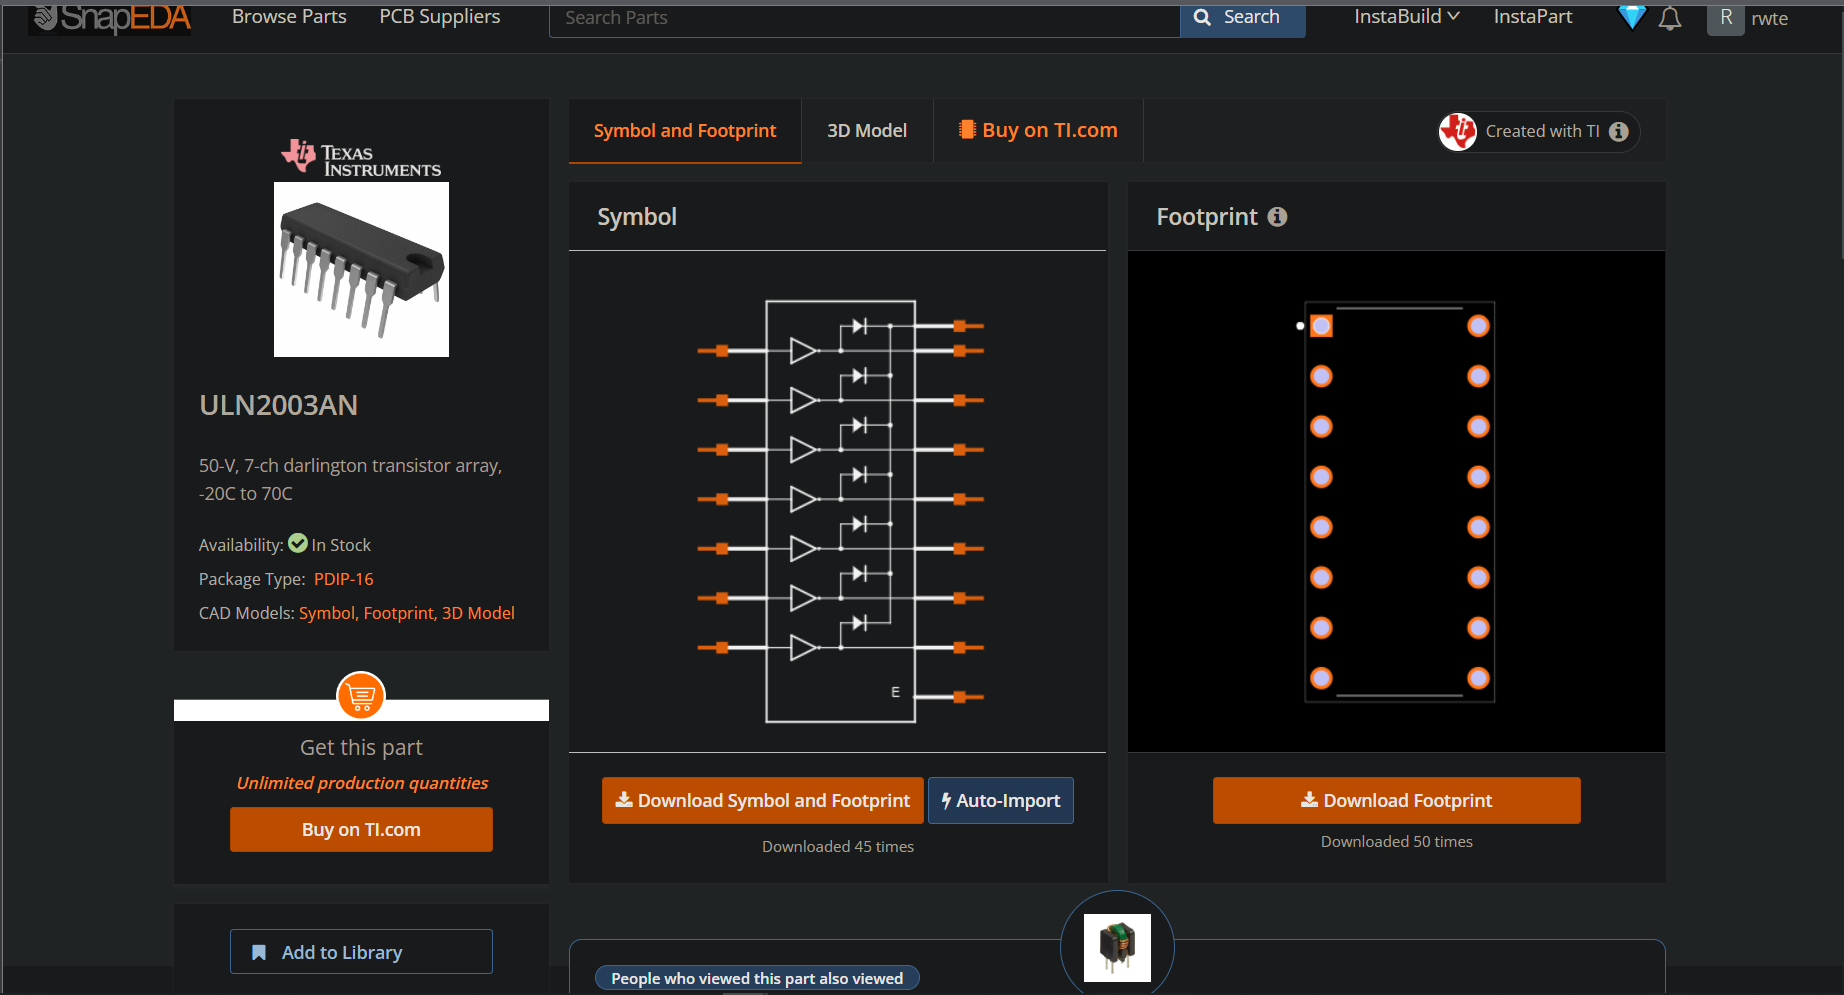
This is also the same for the uln2003an chip.
Then importing it into my Eagles library to be used to start wiring.
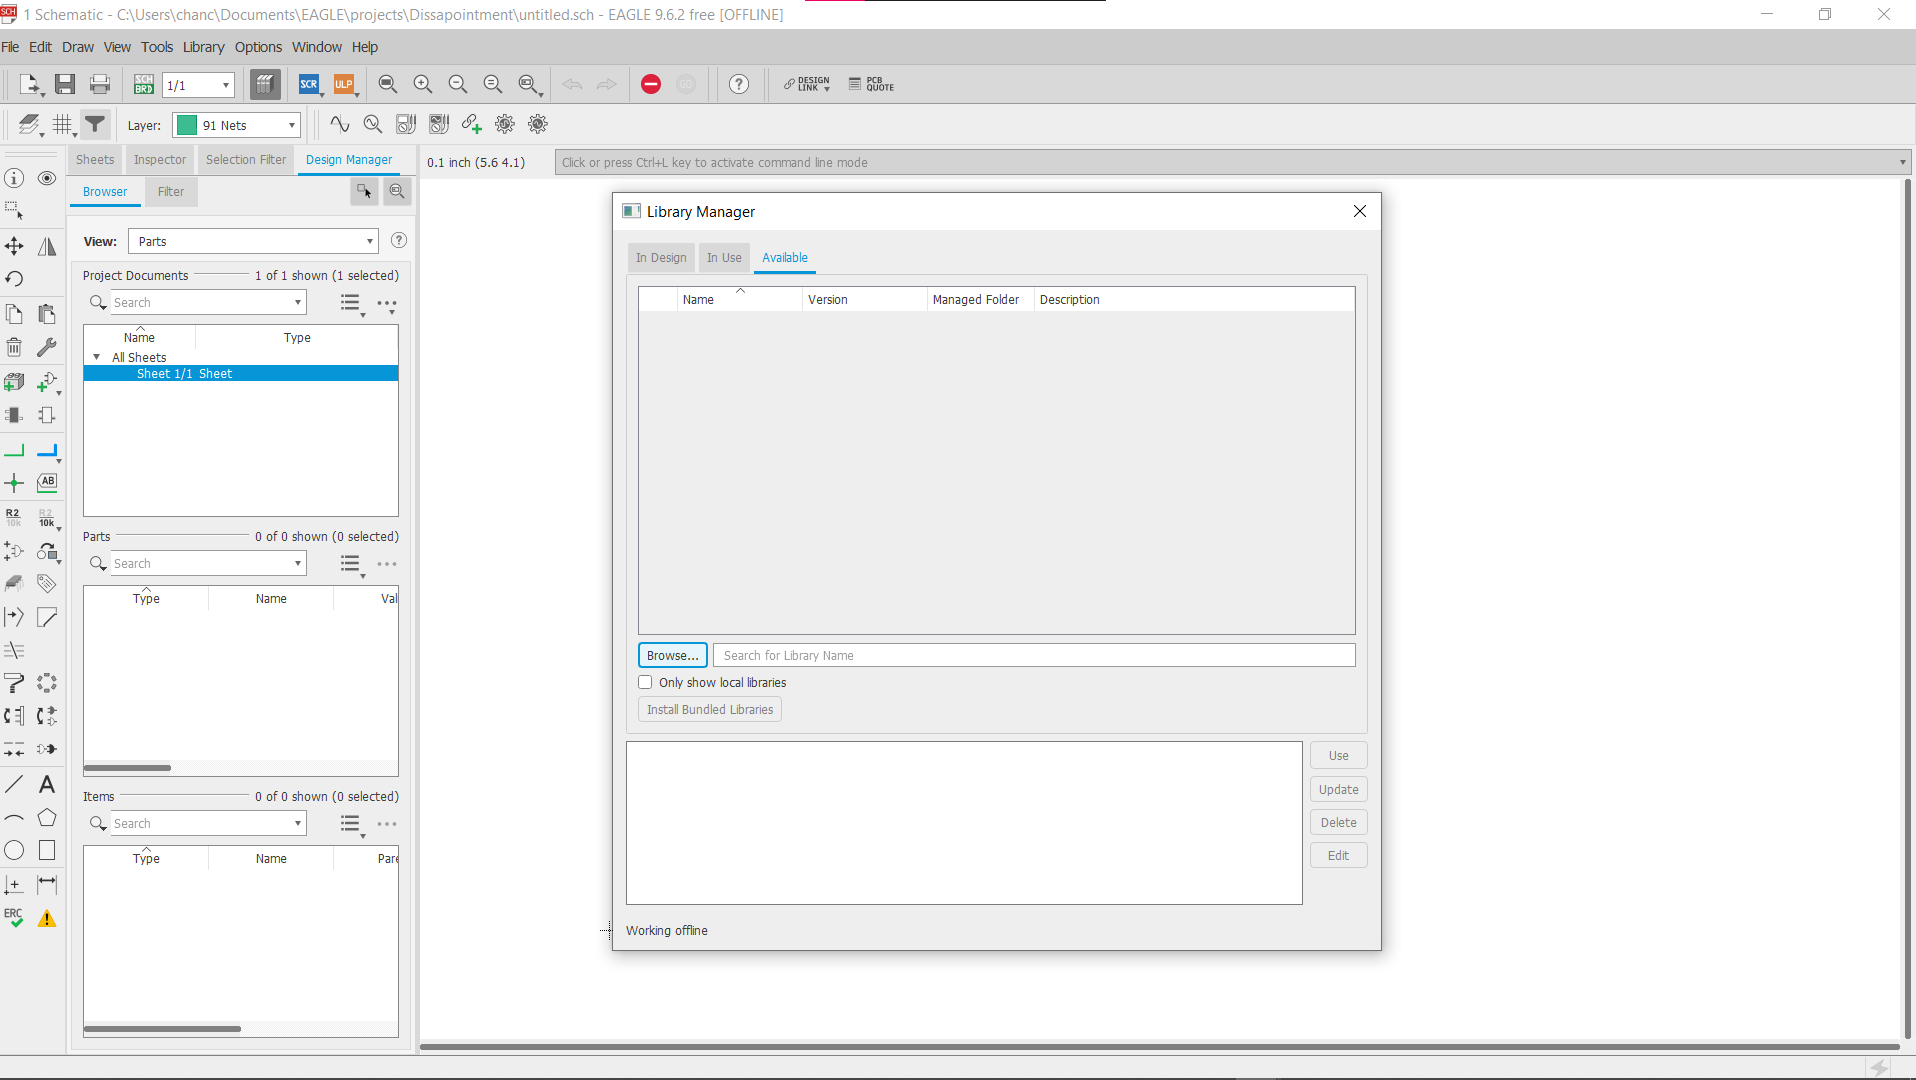
Eagle Libraries:
Attiny88 footprint TQFP
AMS1117 foorprint
Dr. Azzy's Eagle Libraries, Pinhead+
Initial board traces:
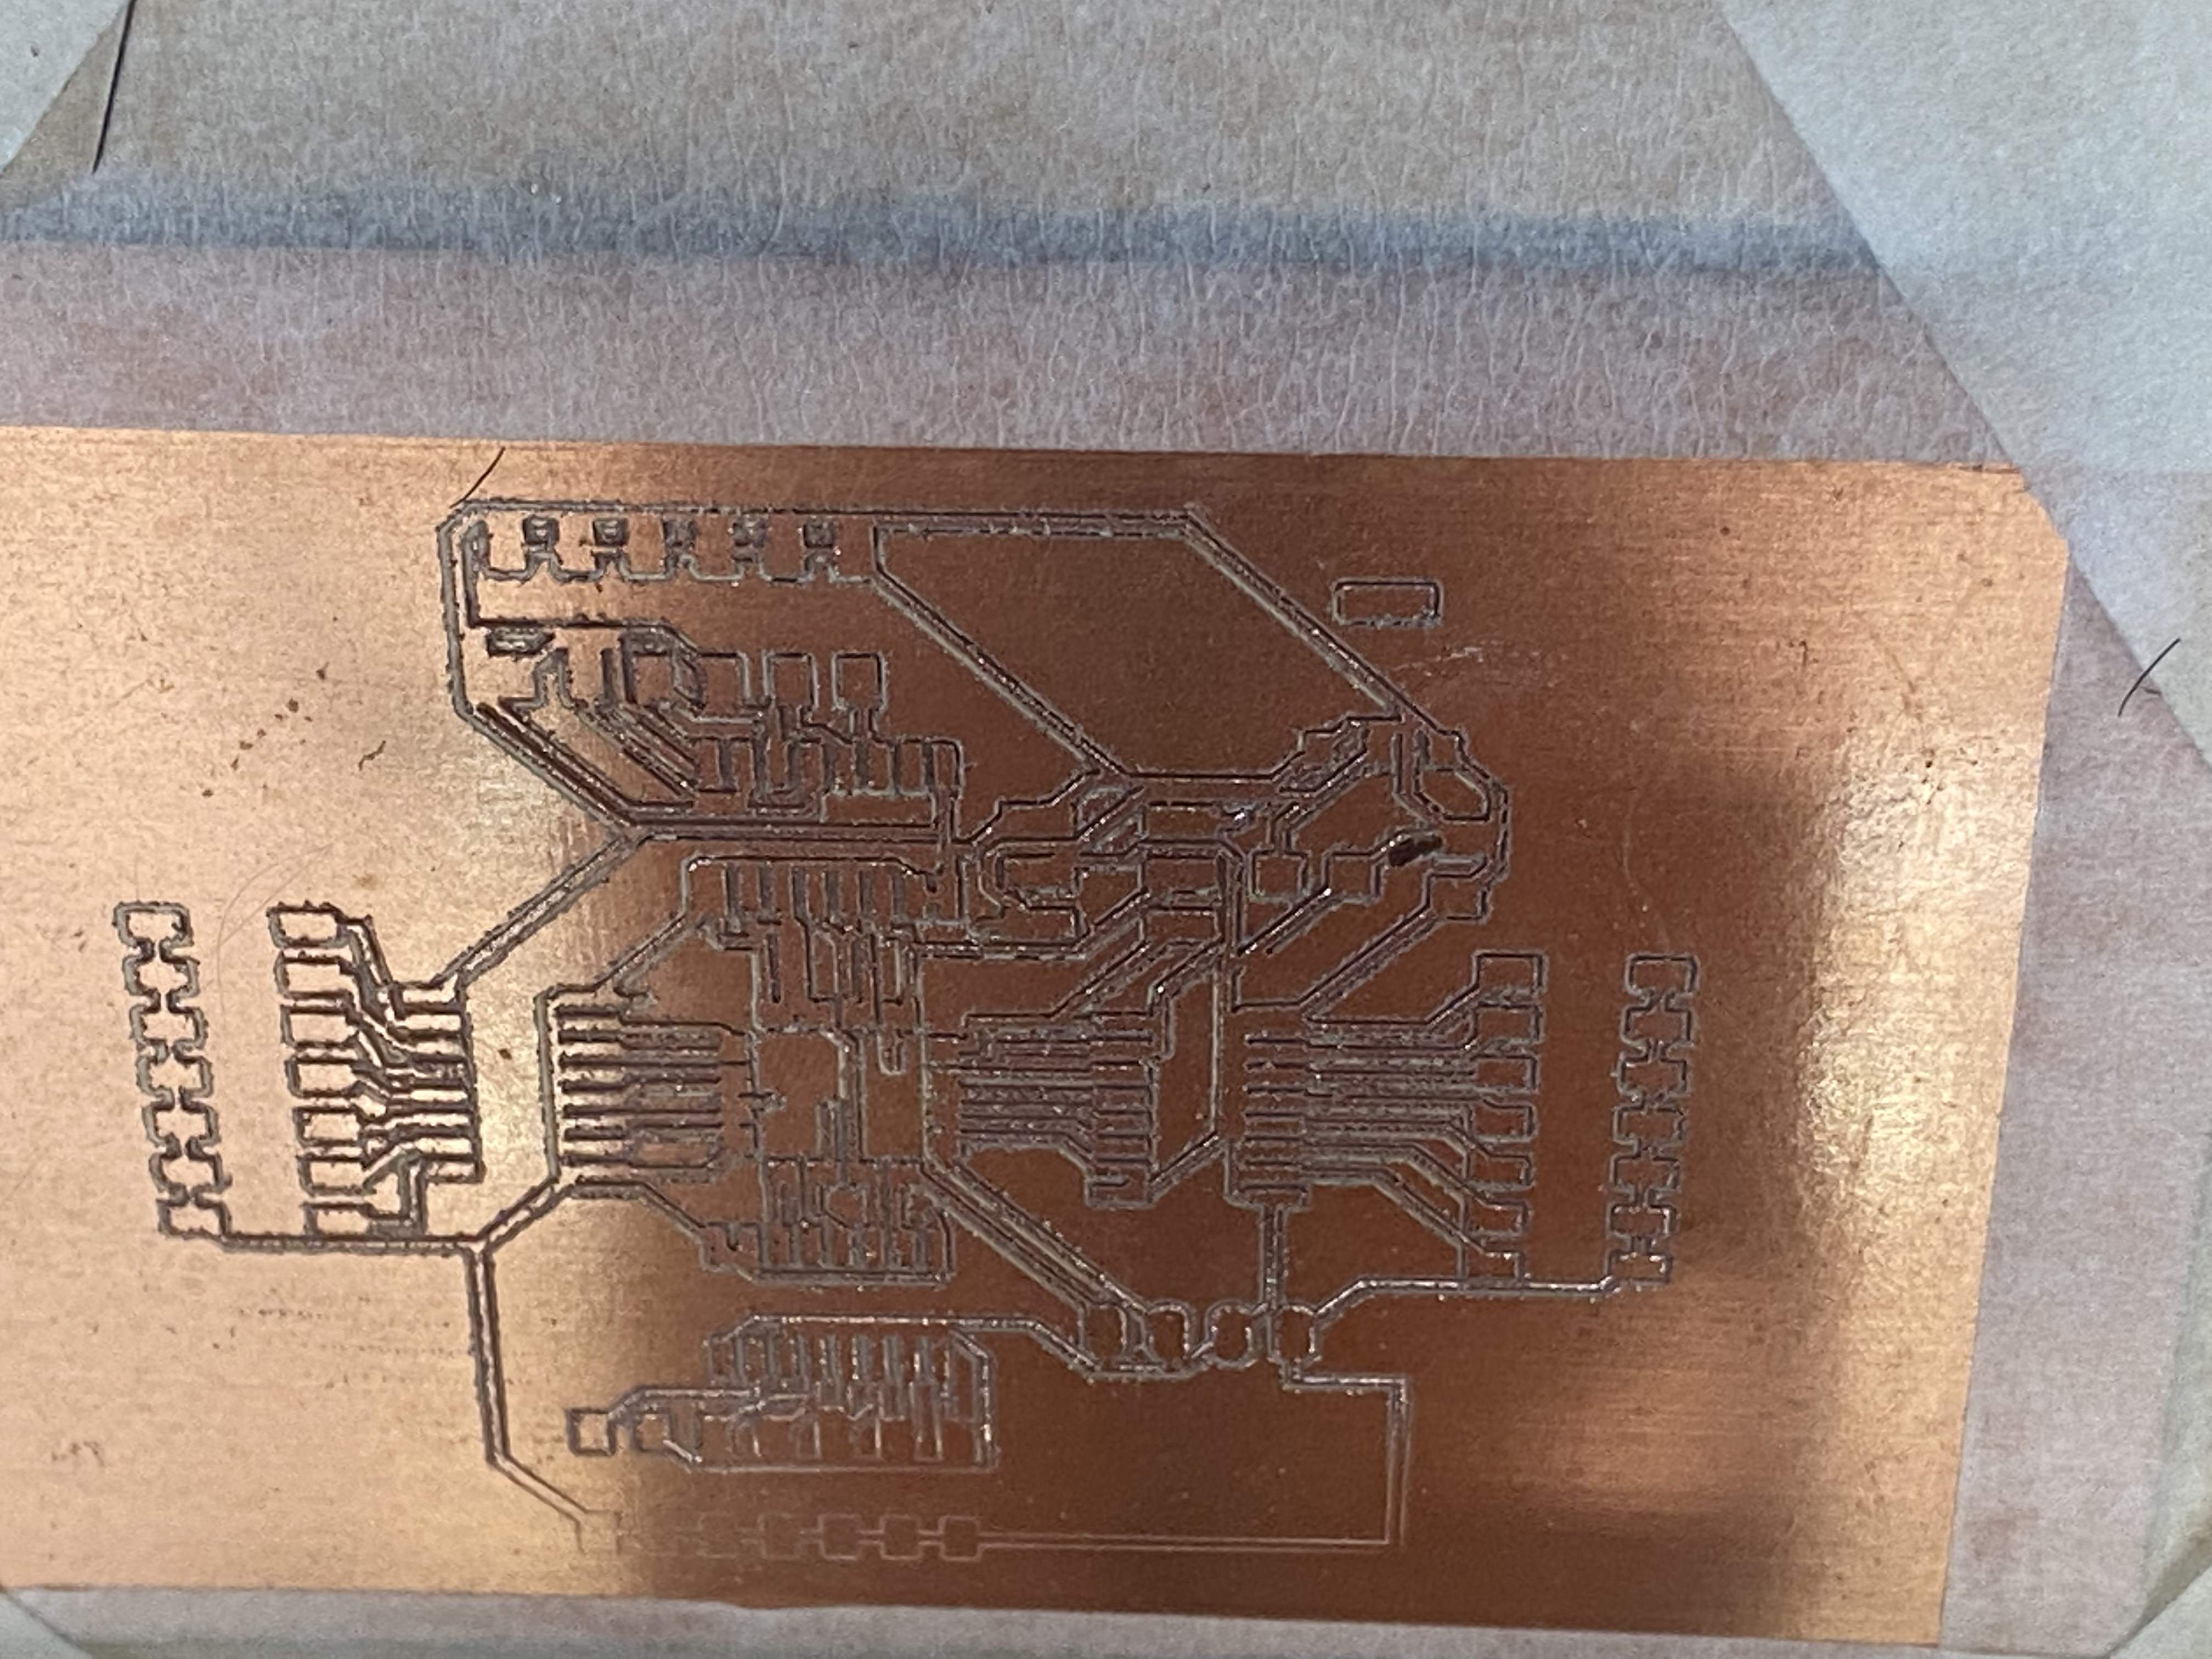
I had used auto route to generate the traces, but the traces were too close together and not milled out, with other imperfection issues, thus I had decided to make another board.
There is also a big hole in the board, which is caused by using the wrong program on Mods, with me using the 2d mill instead of the 2d mill PCB, which caused the Gcode cut to be through the board, which was too deep.
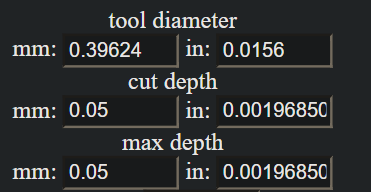
Therefore, in the future I would have to check the cut depth before cutting. For the copper layer it is 0.05mm cut depth.
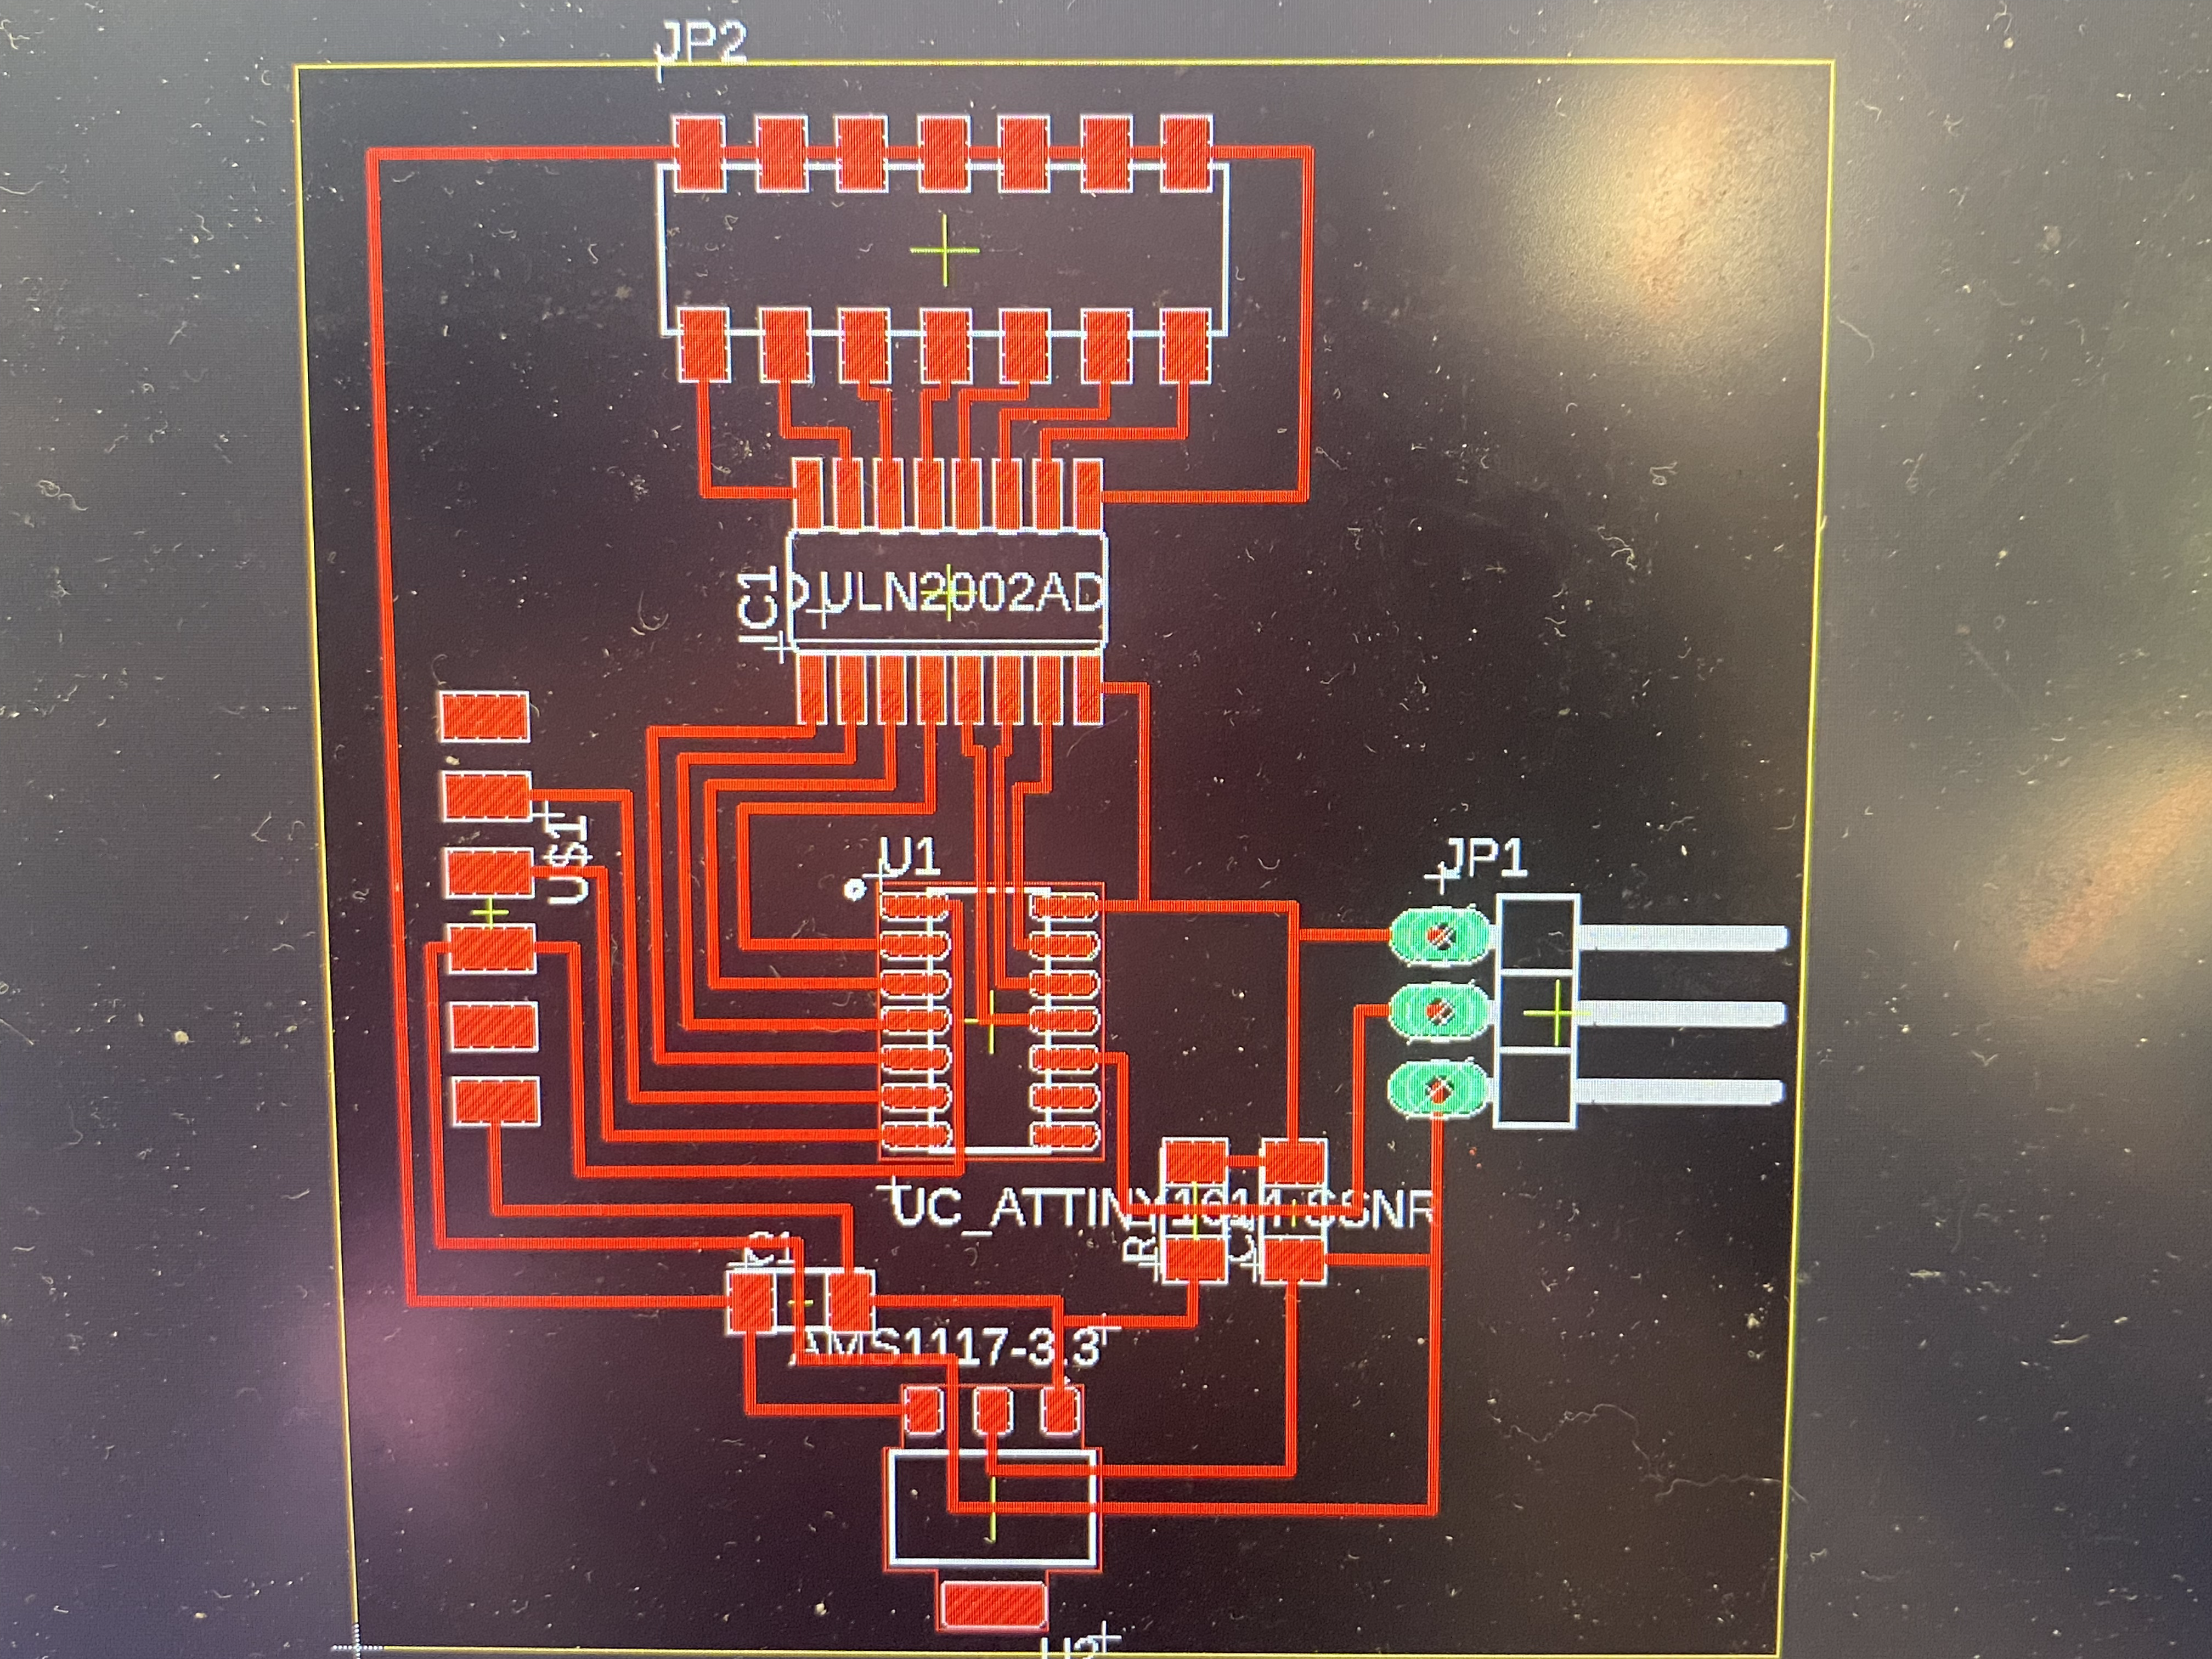
After the first attempt, I rewired the whole board by hand on Eagle.
I had renumbered the output pins of the ULN2003N and the ATTINY88 pins to be aligned physically. This will ensure a cleaner flow of lines rather than the criss cross lines of the first board.
The board schmetics:
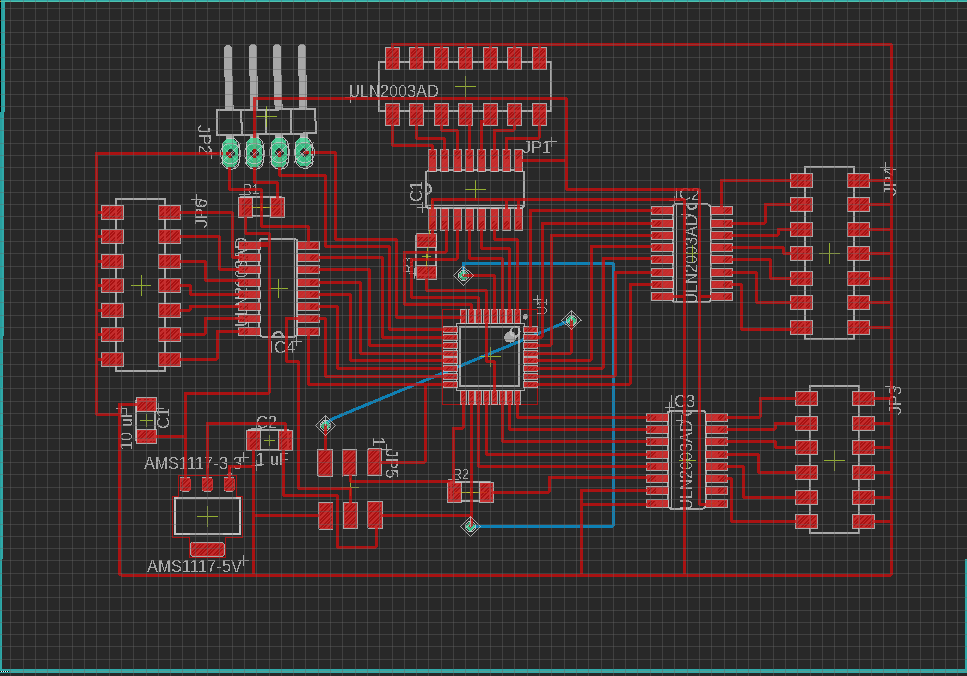
Final music board design
Final music board schmetics
Tapping board onto the machine
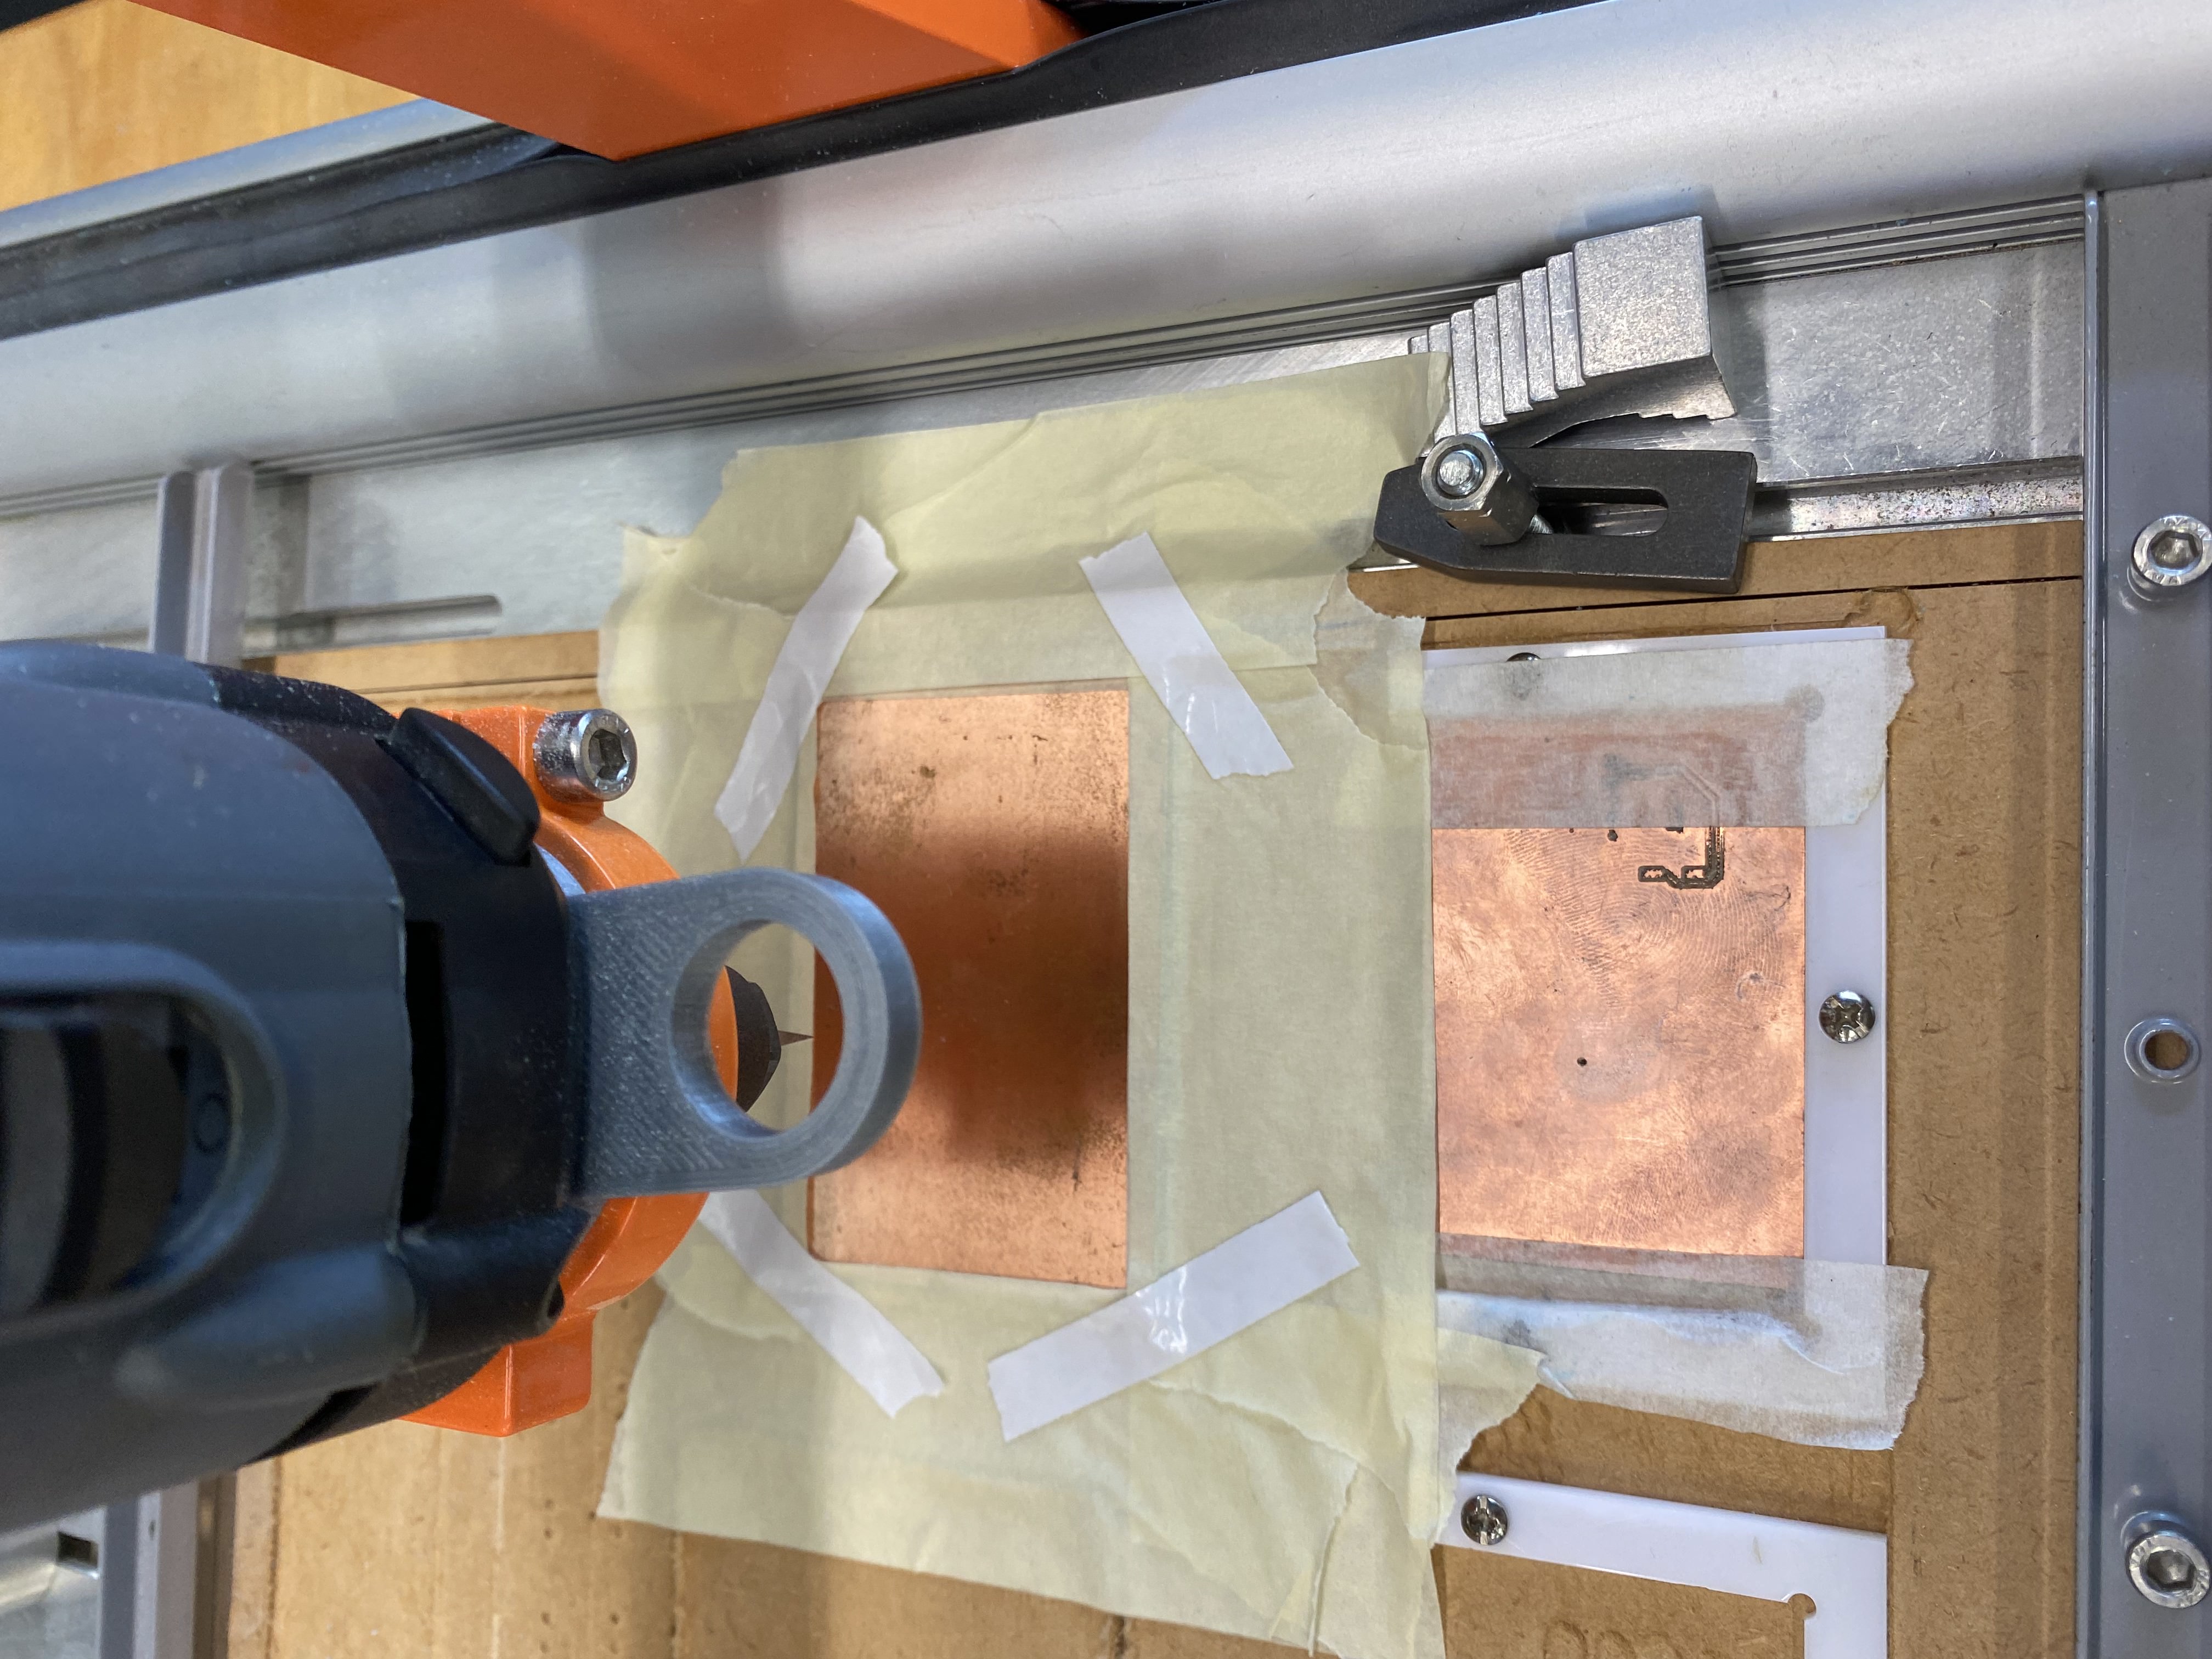
Final board traces

My sizing of the holes were wrong, thus resulting in a circle profile cut instead of a drill operation.
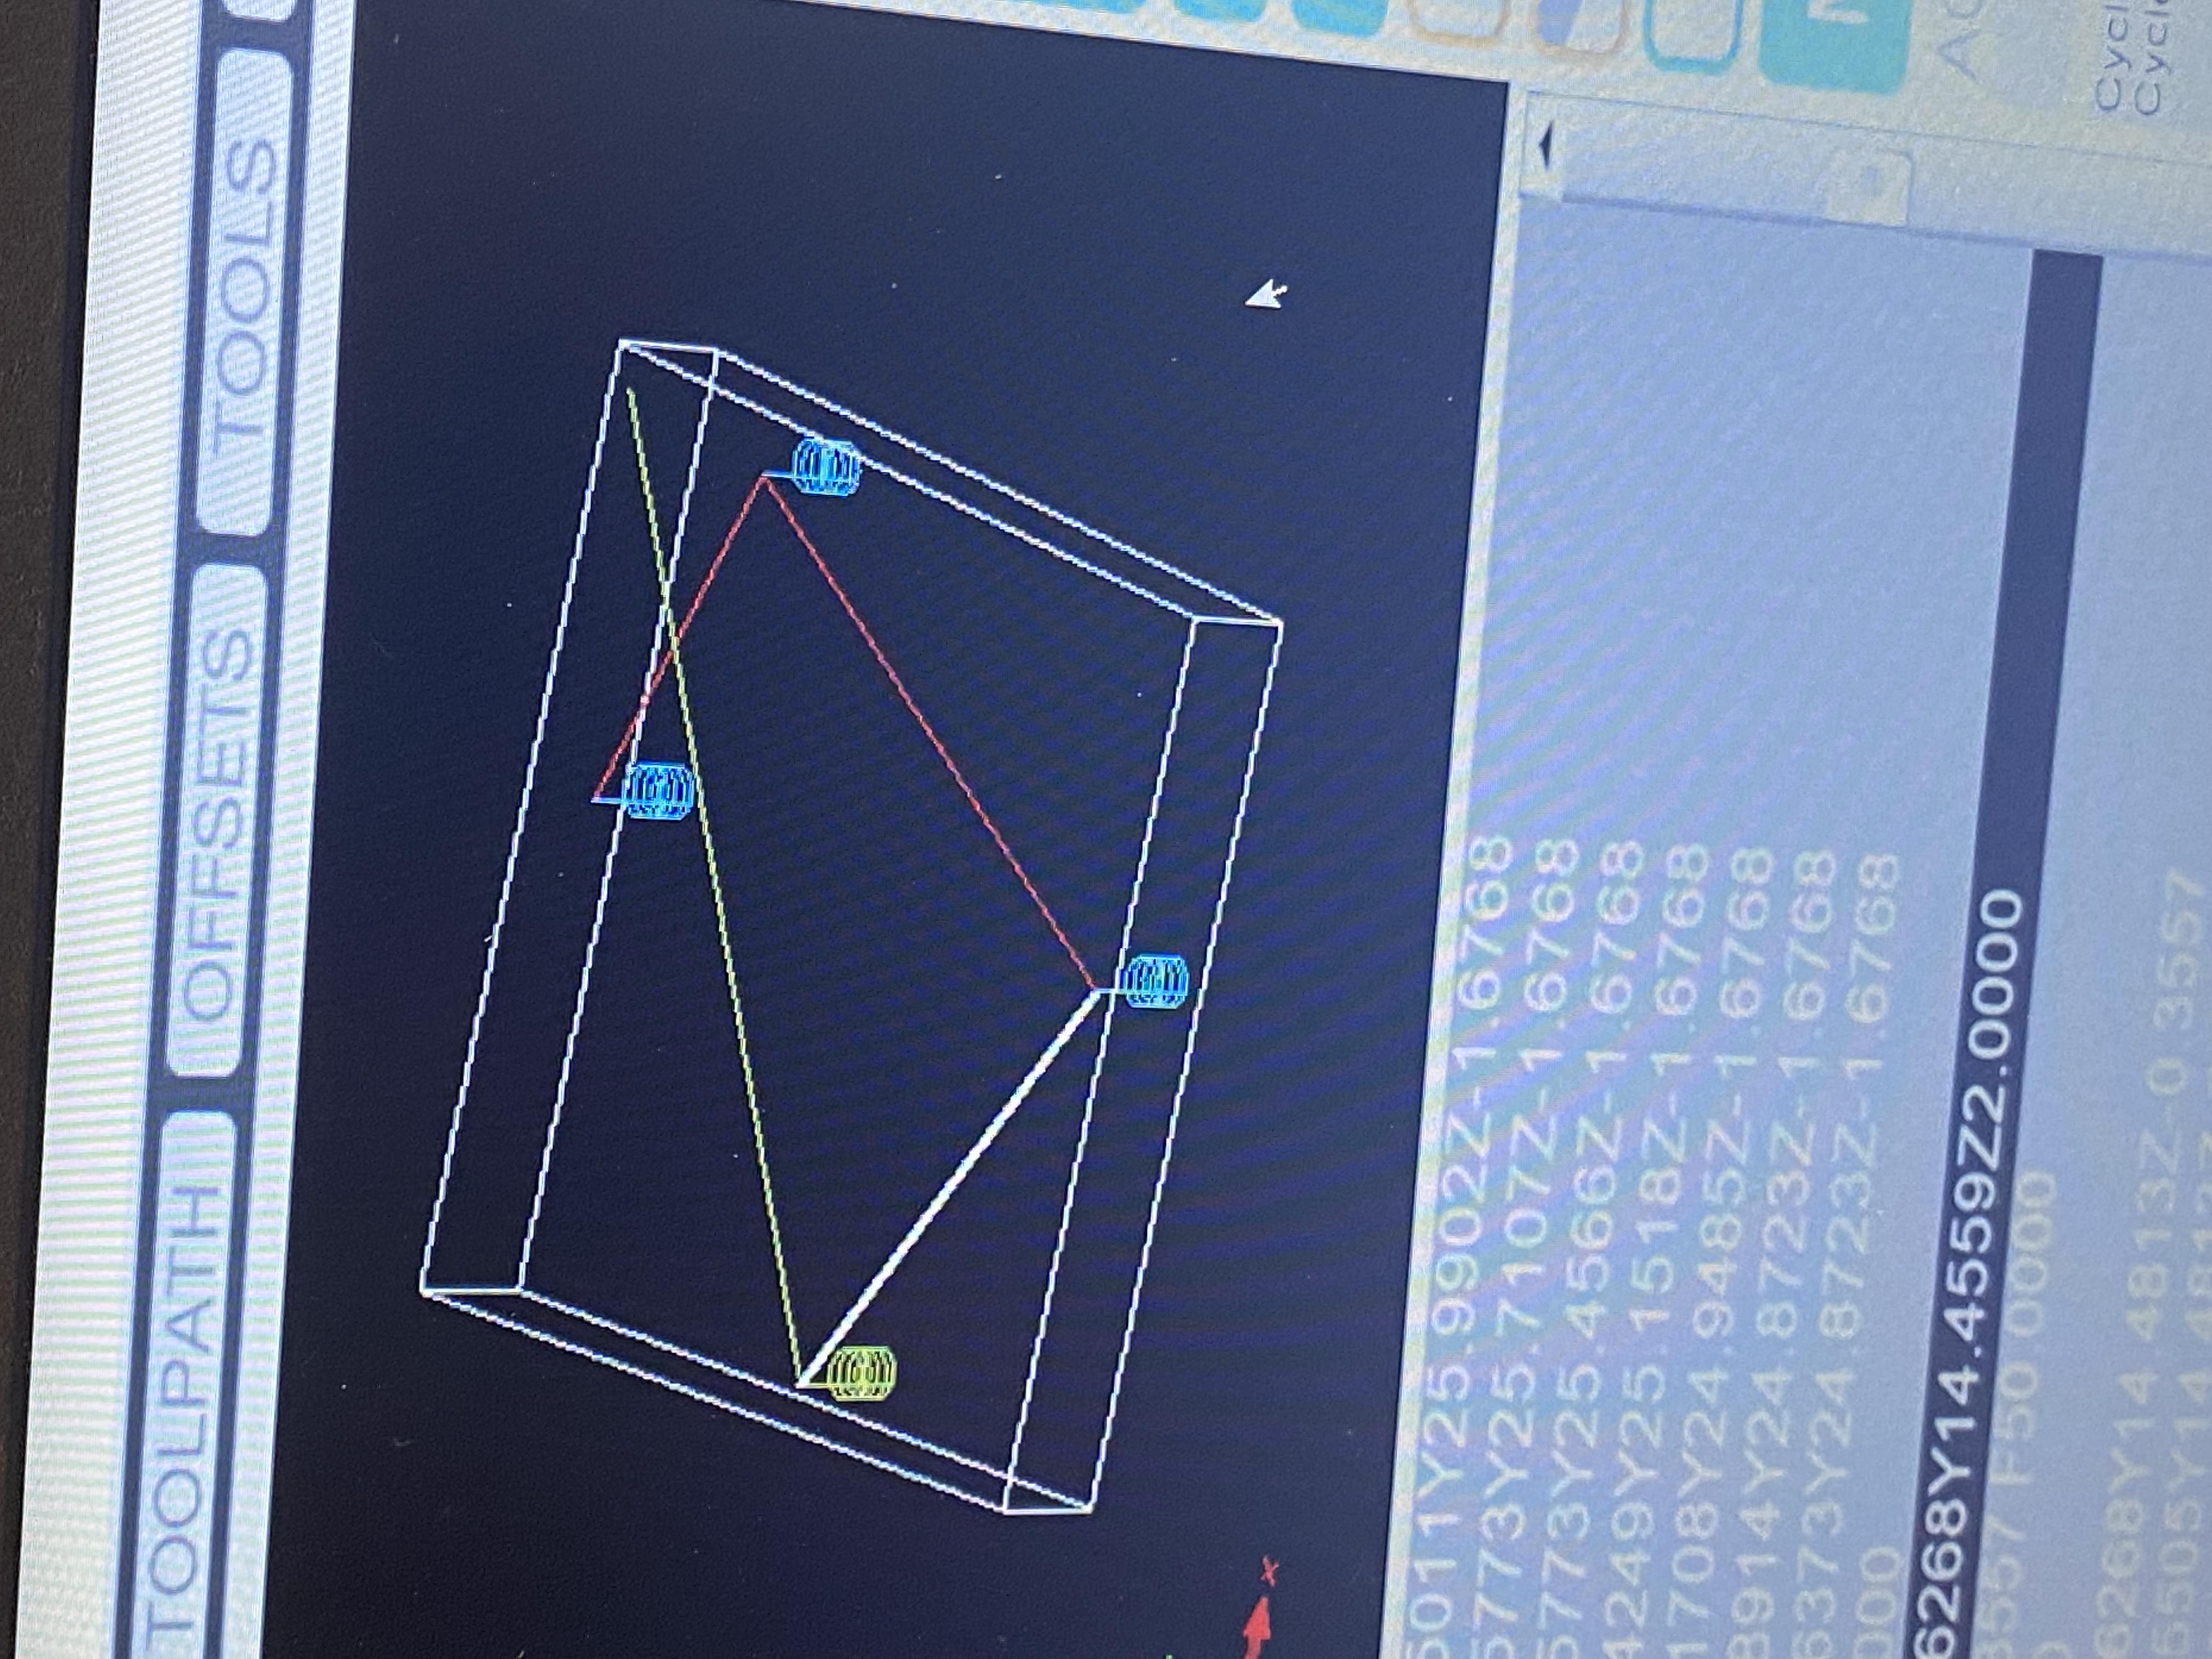
Thus we had to use a manual bench drill to create a small hole in the board.

Hot air reflow soldering of chips
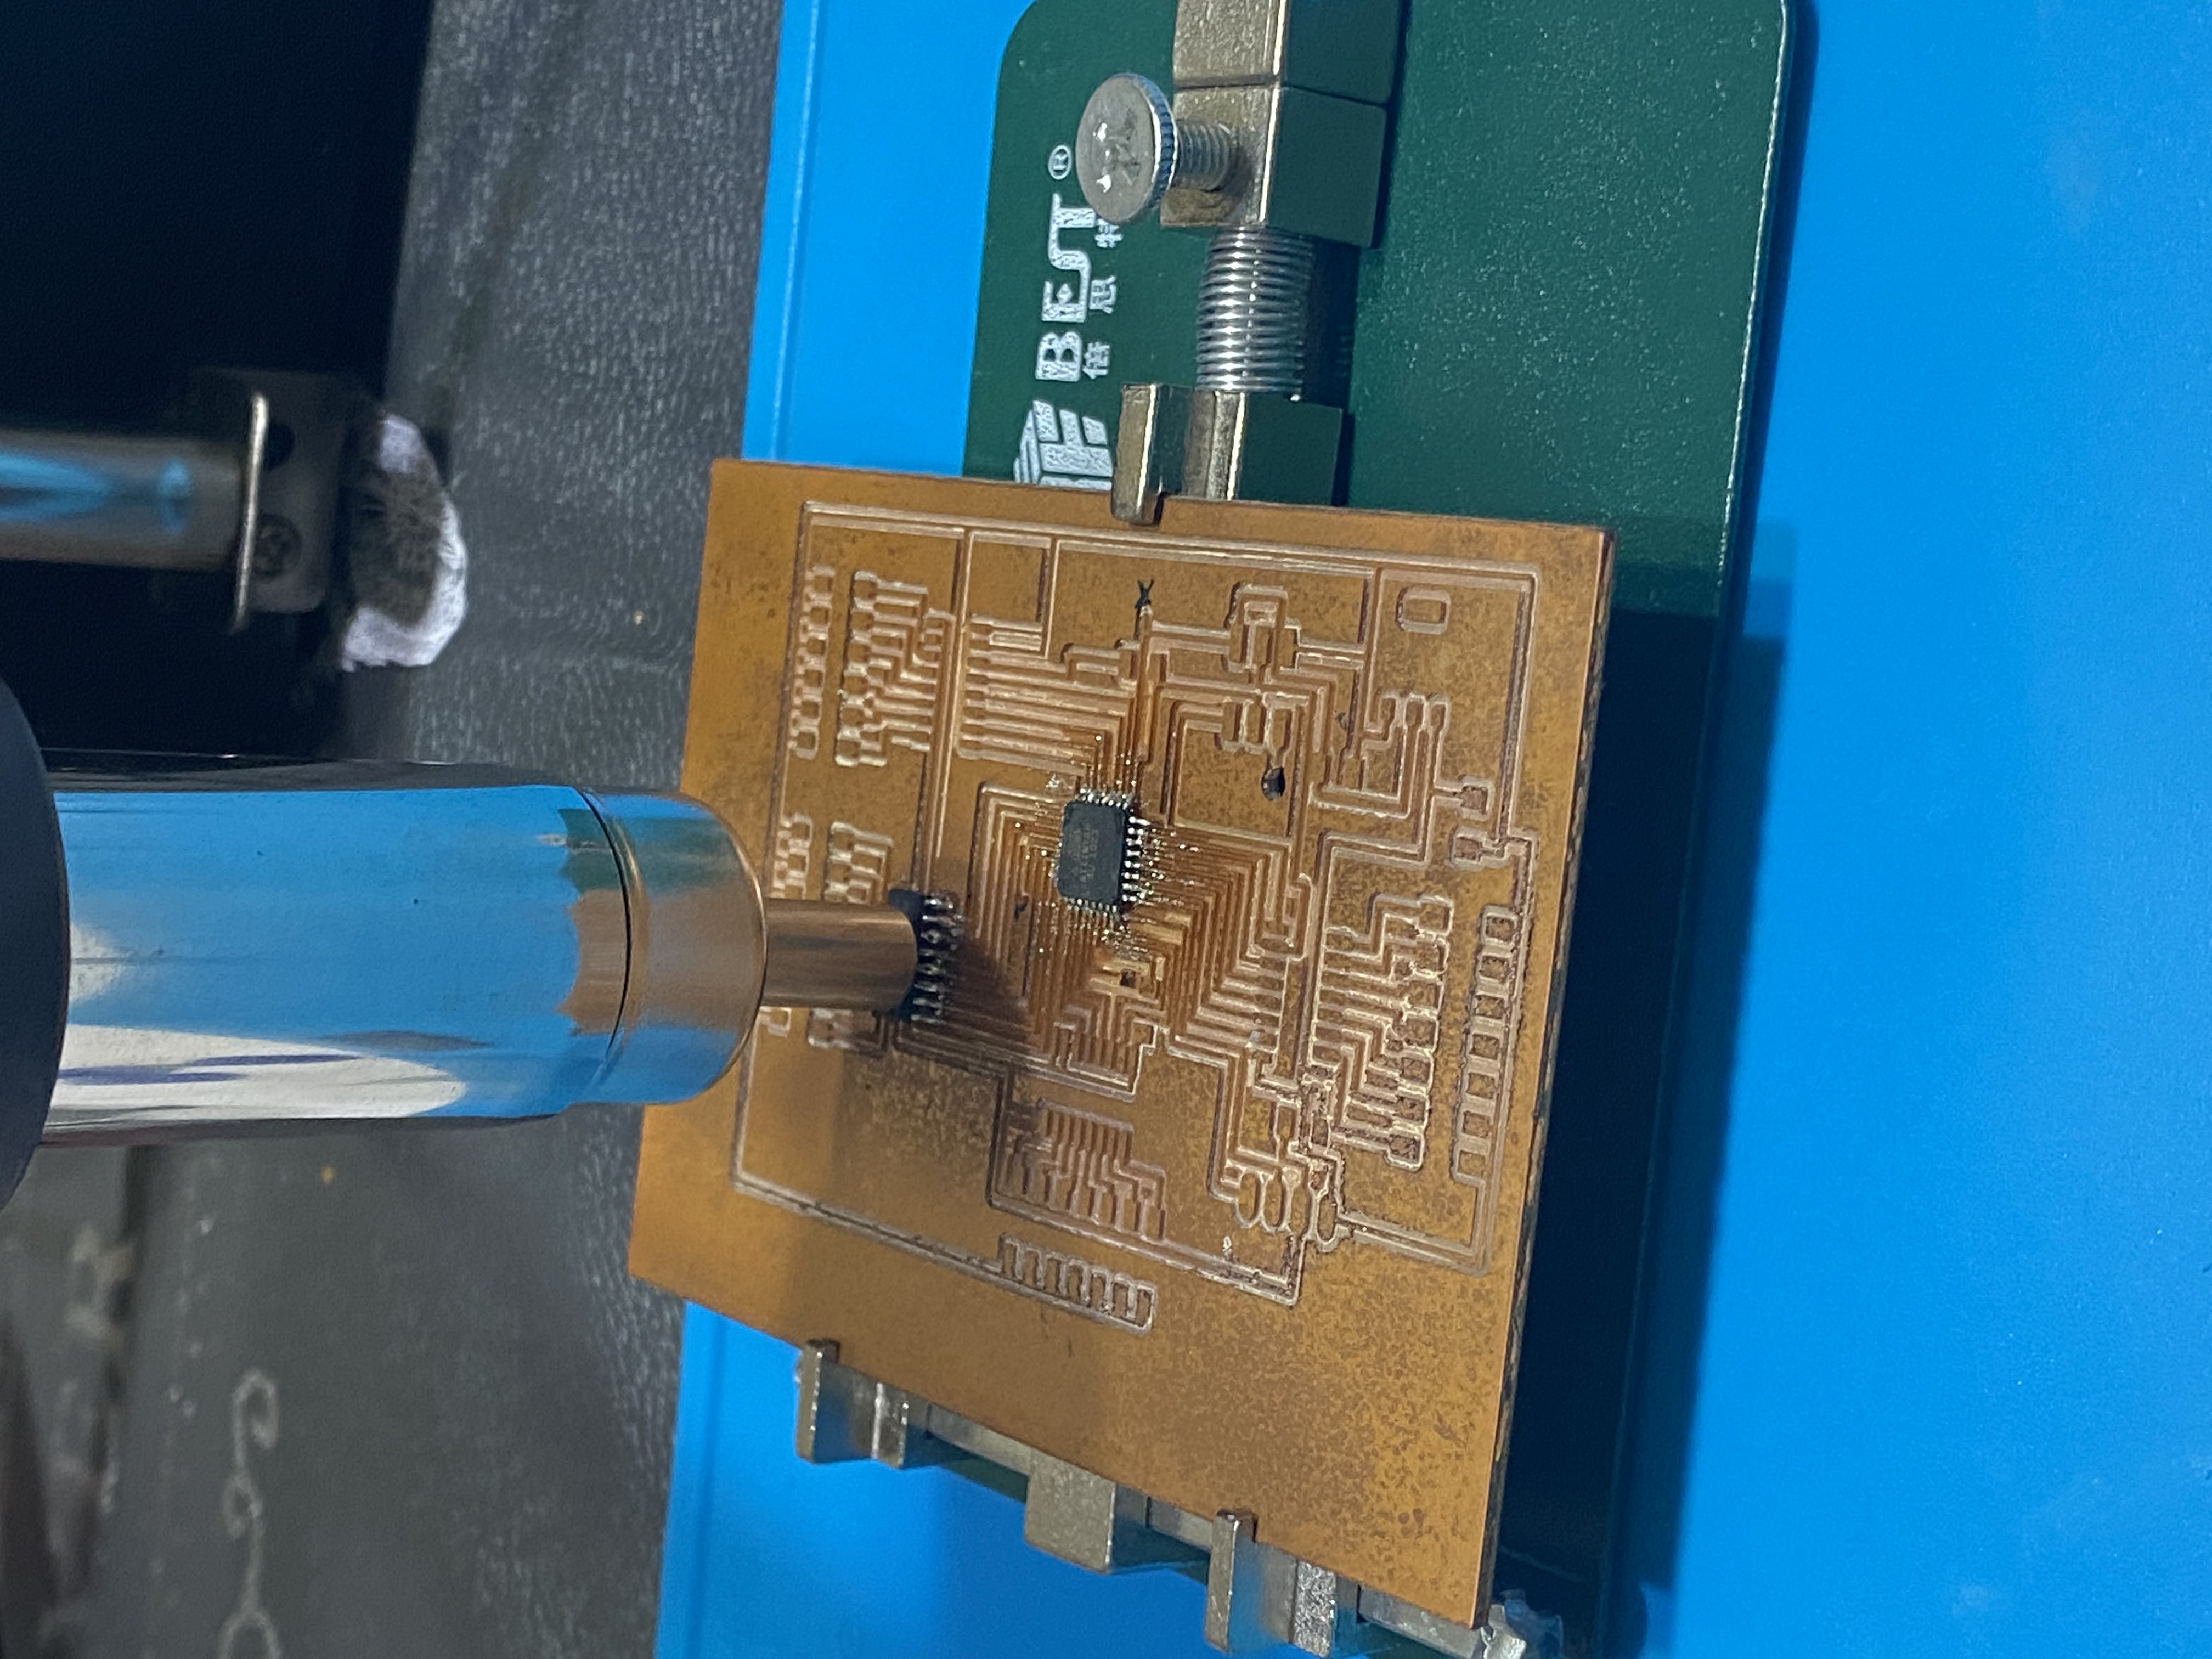
Final soldered board
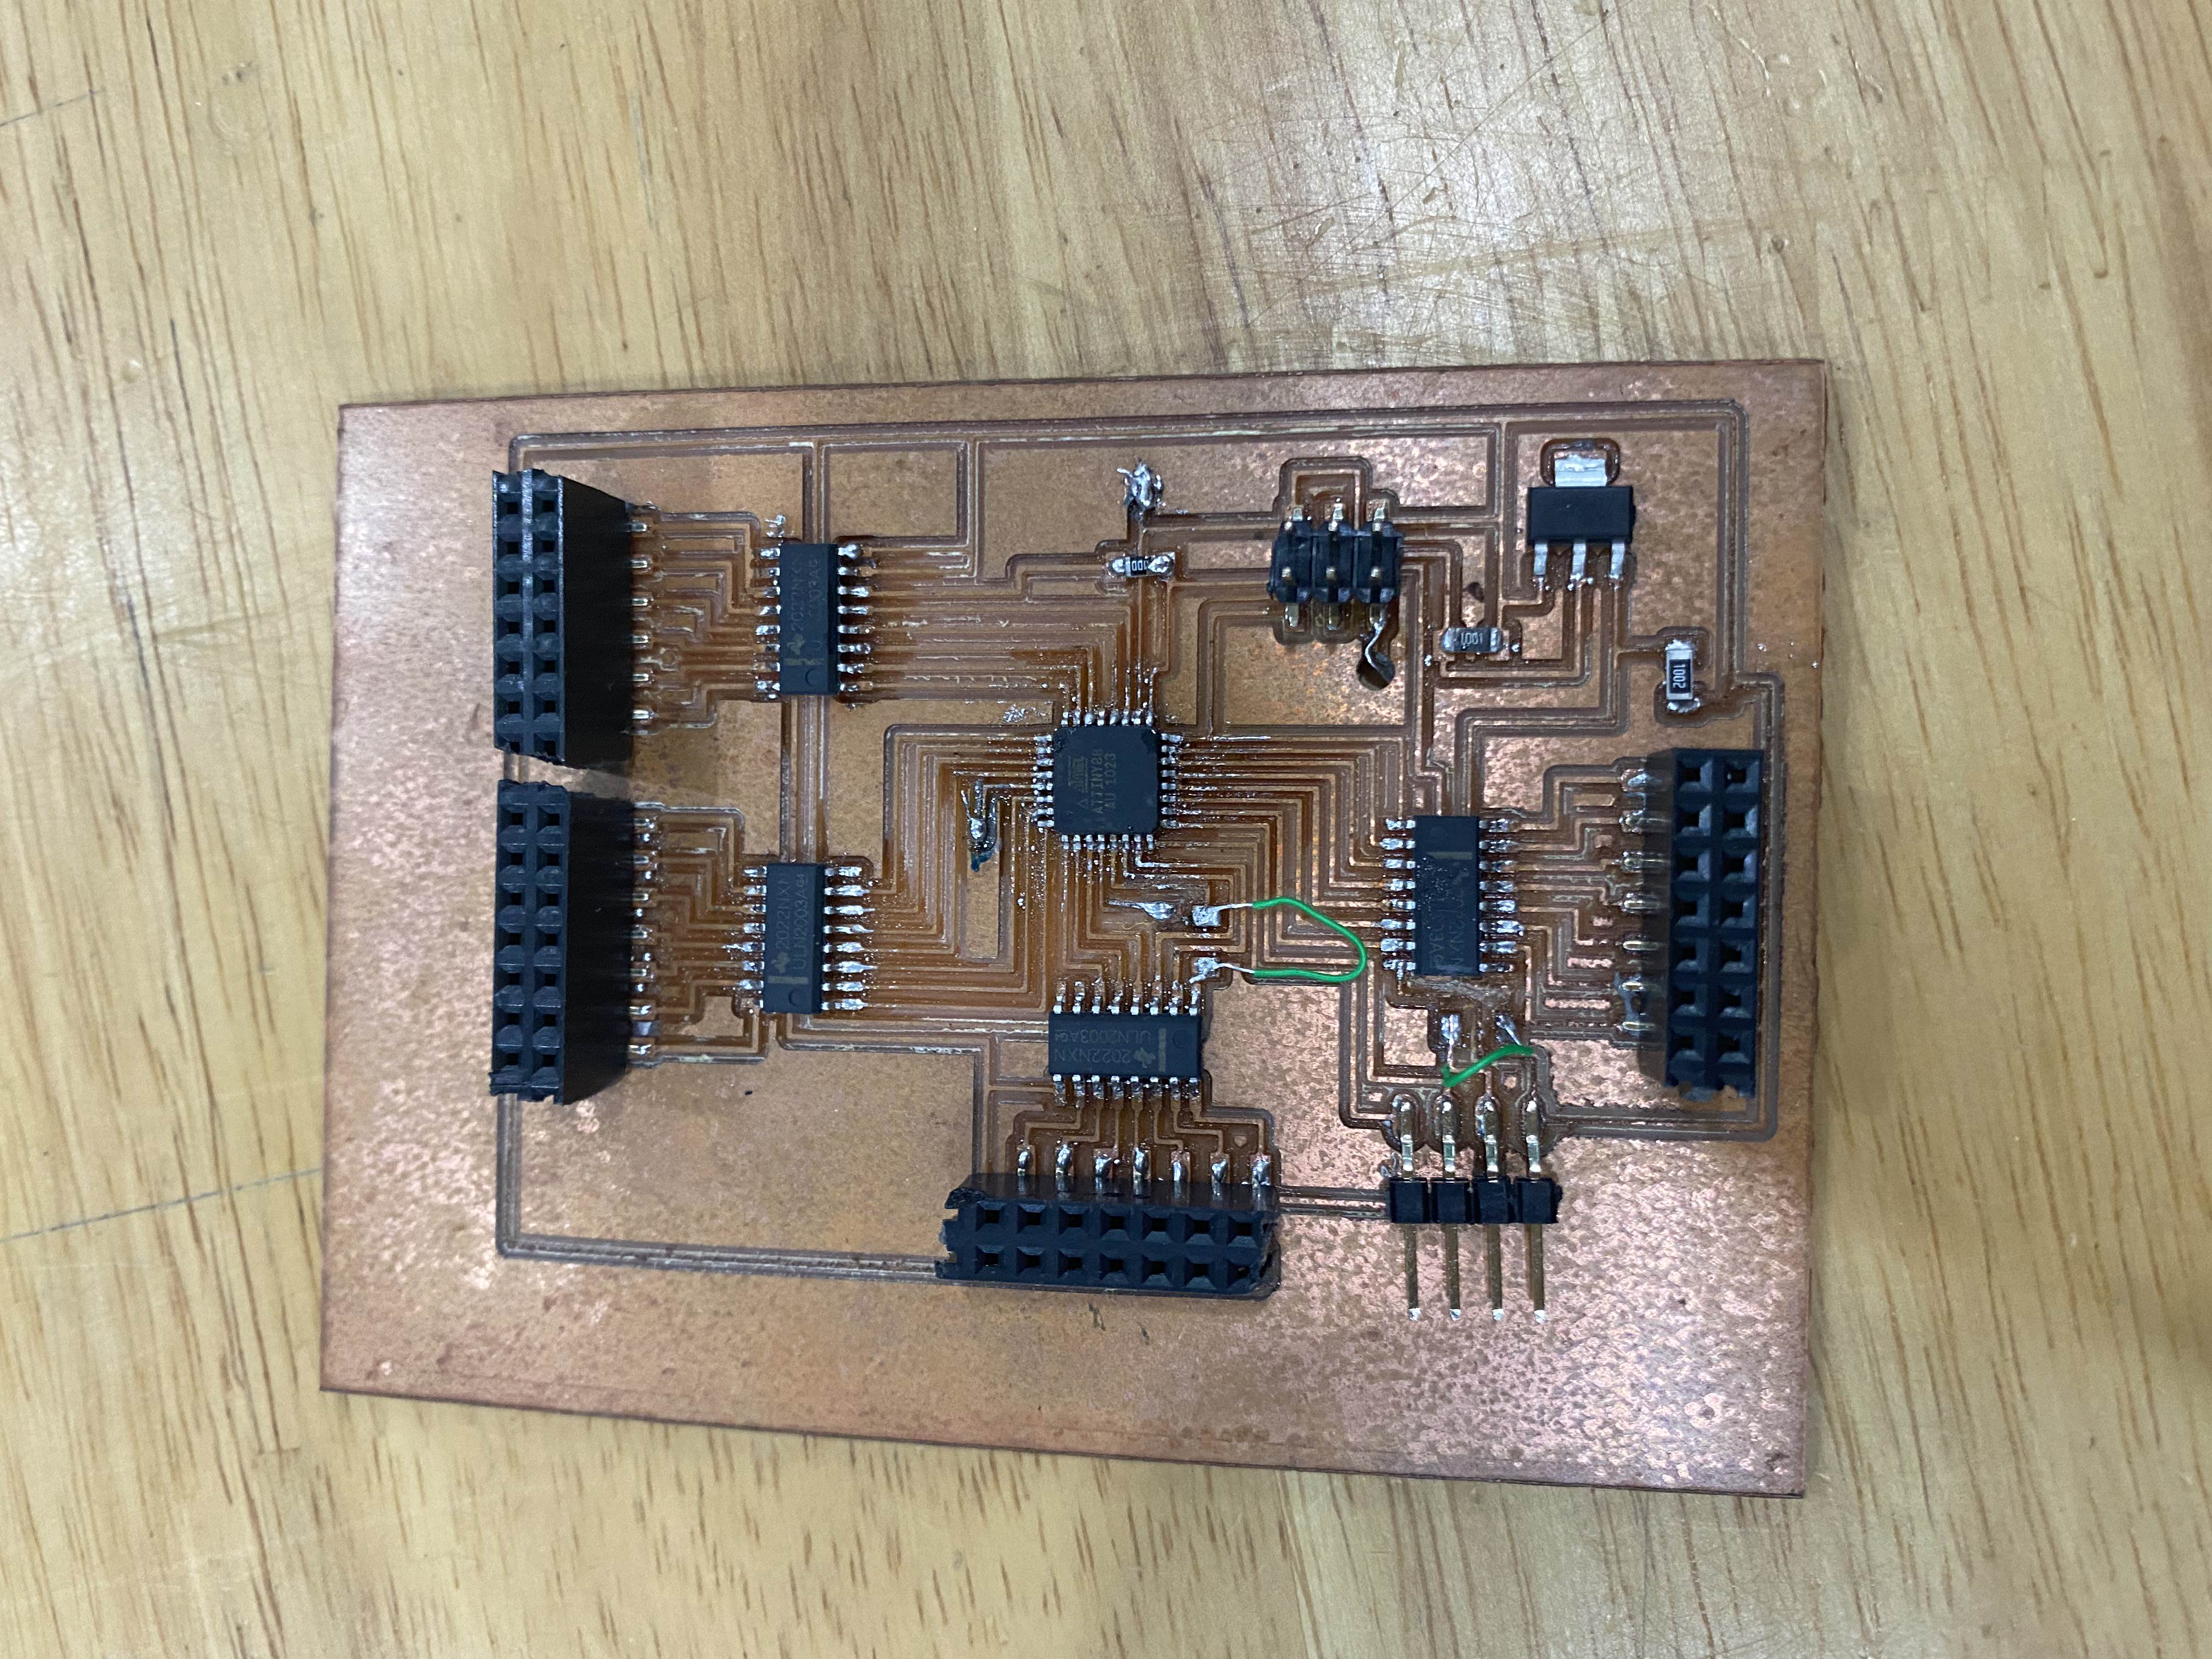
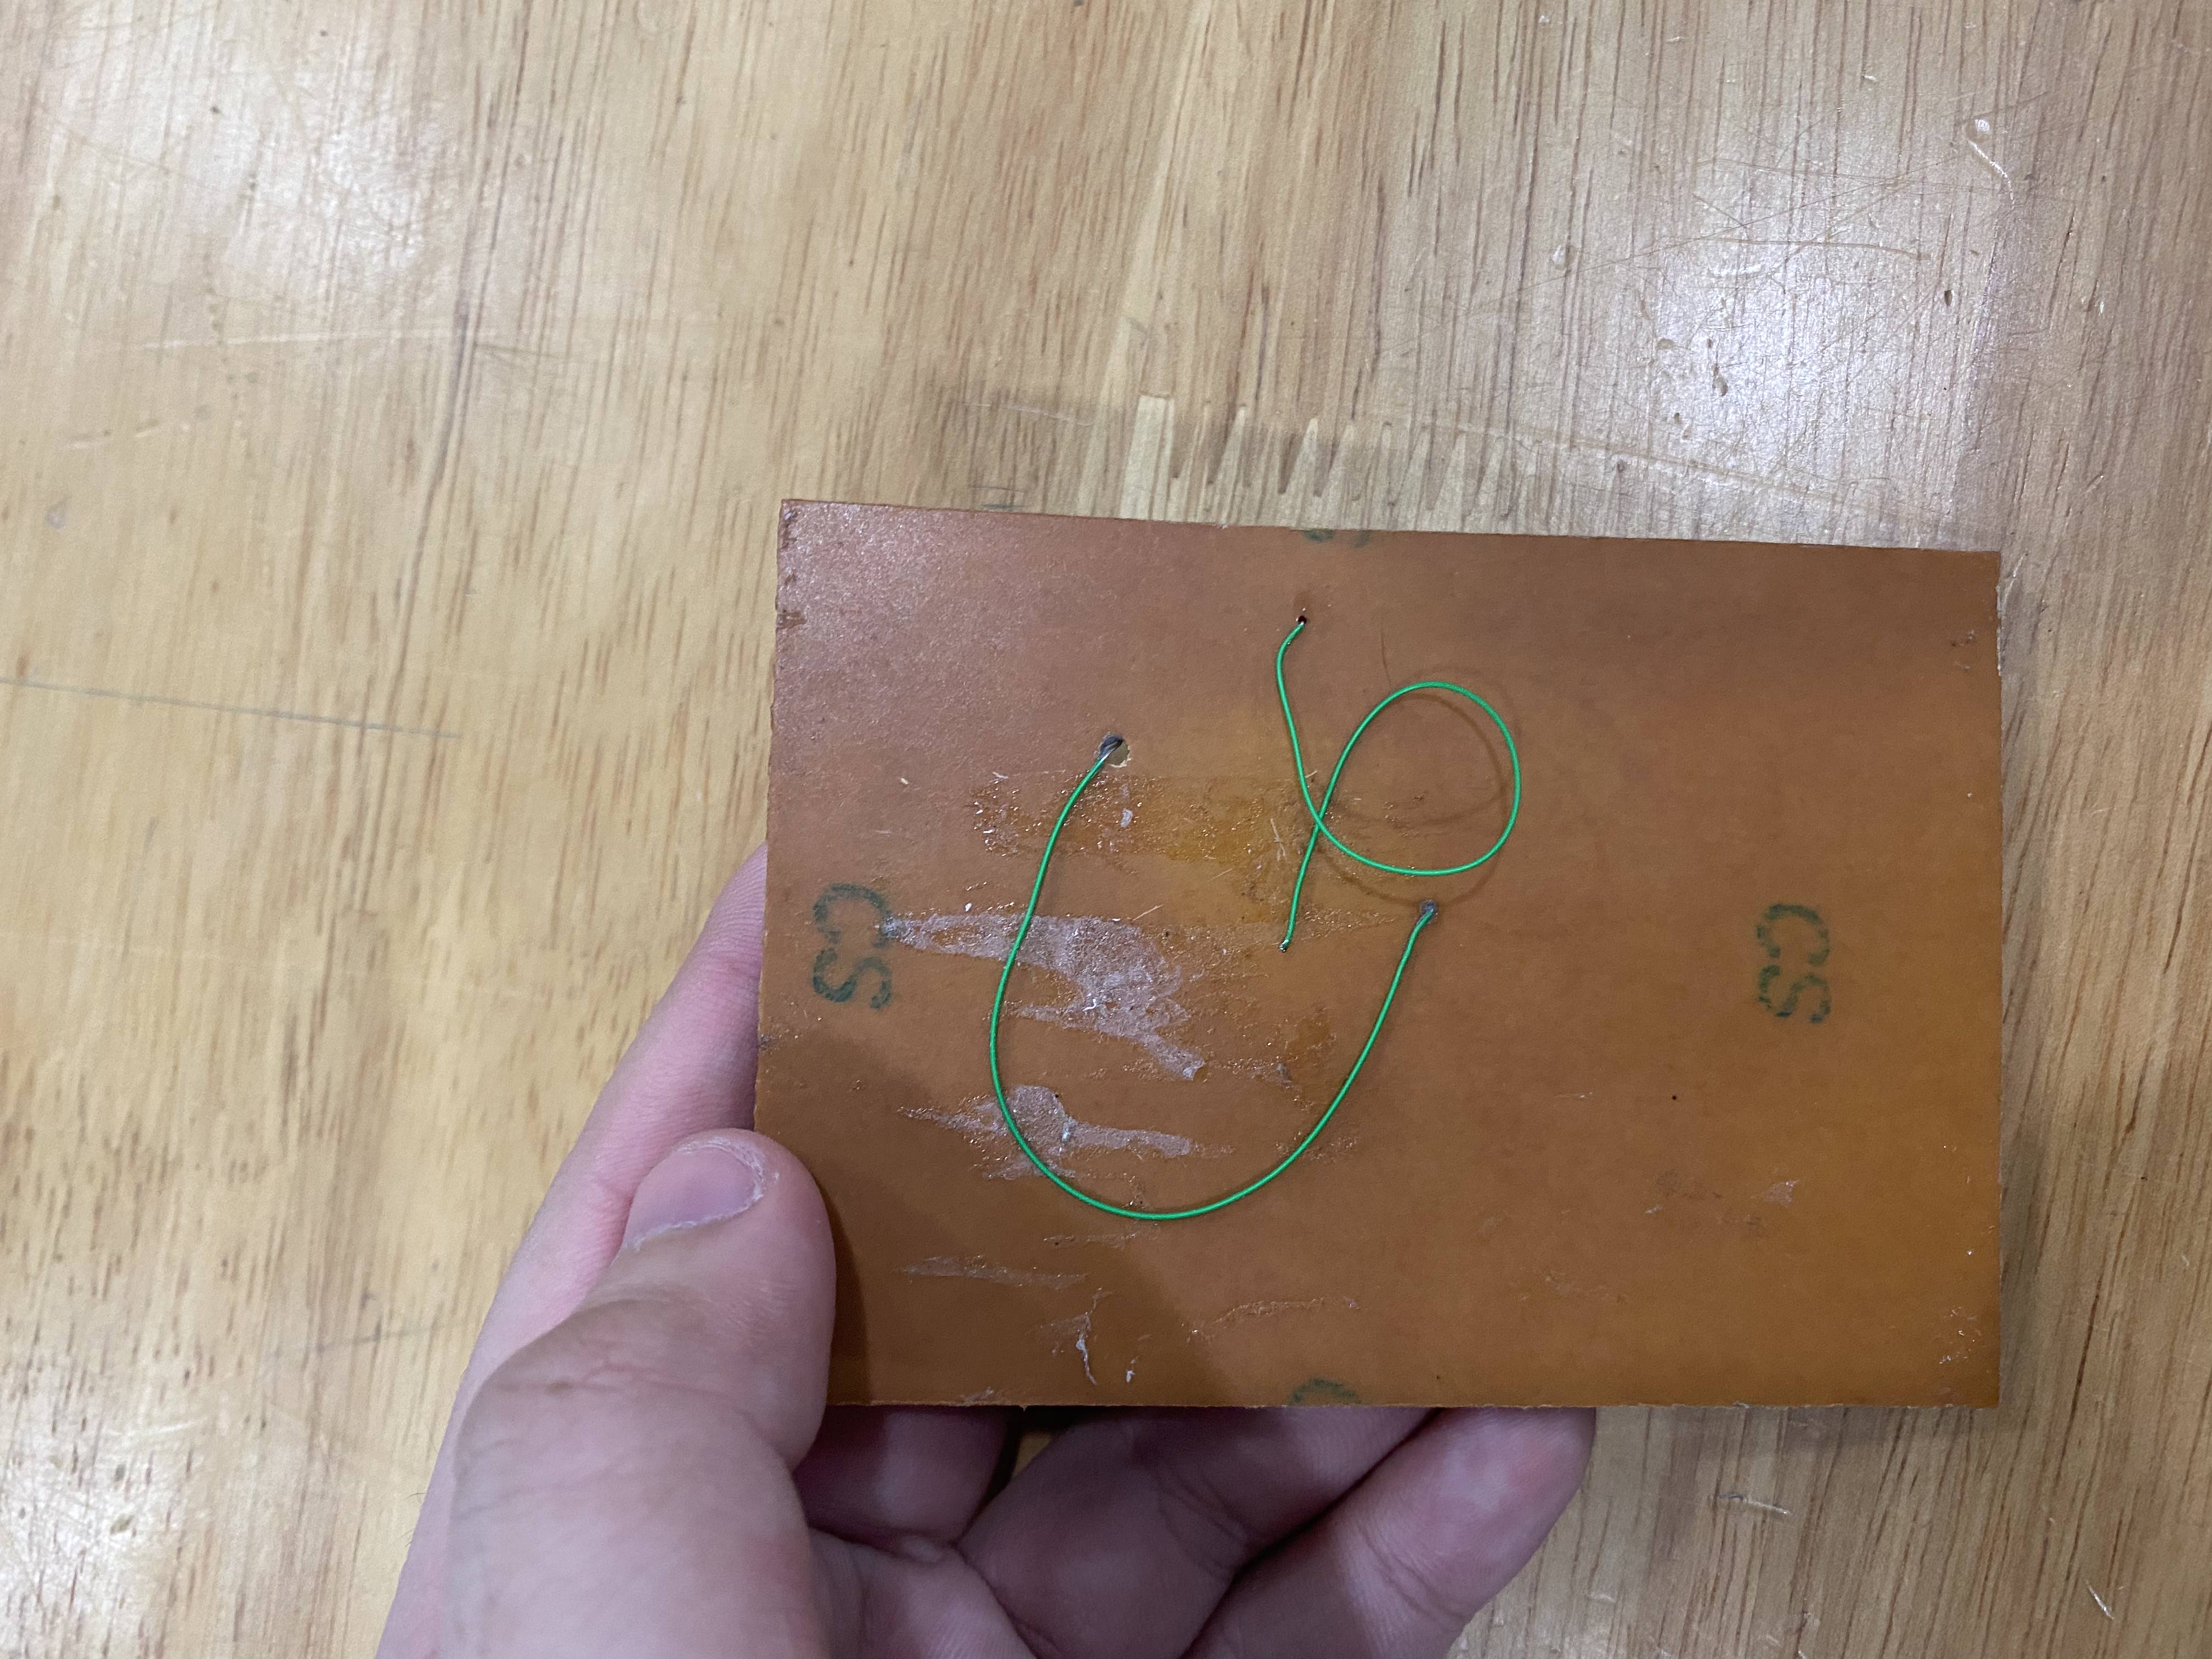
Soldered wire wrapping wires underboard
Some issues with my reflow soldering is that after the operation the channels between the traces had little balls of solder in them, thus creating a possibility of shorting.
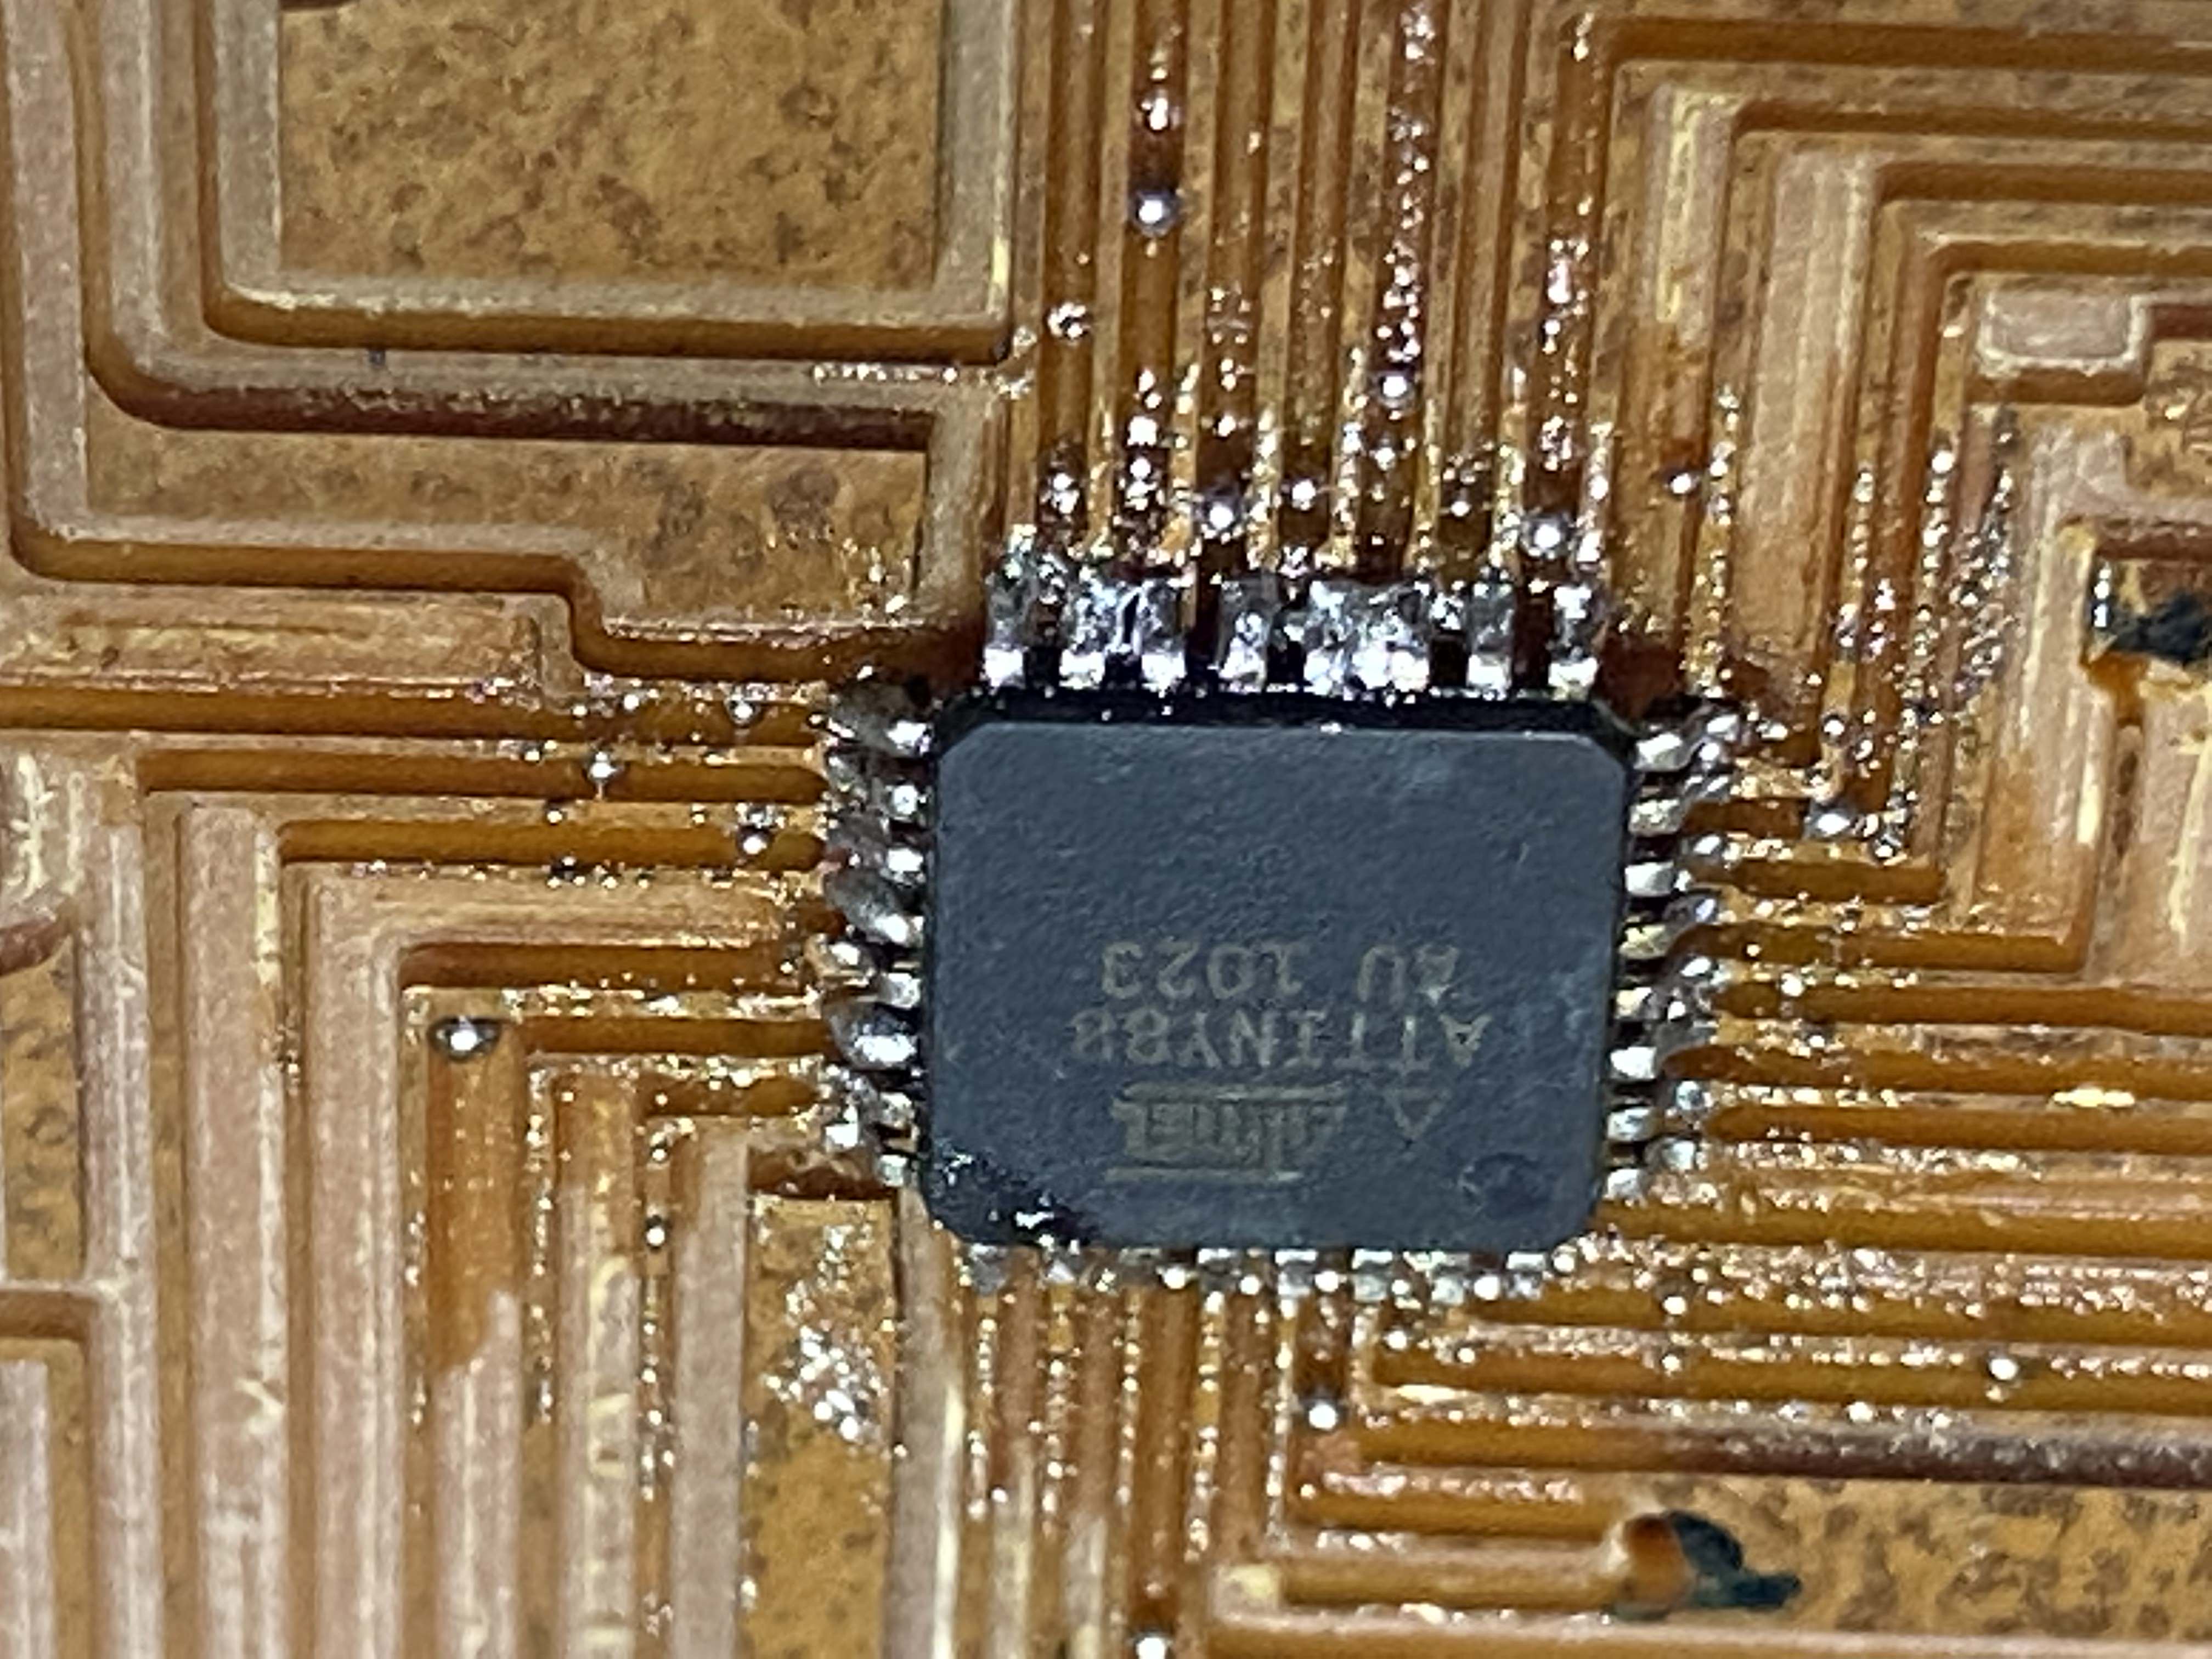
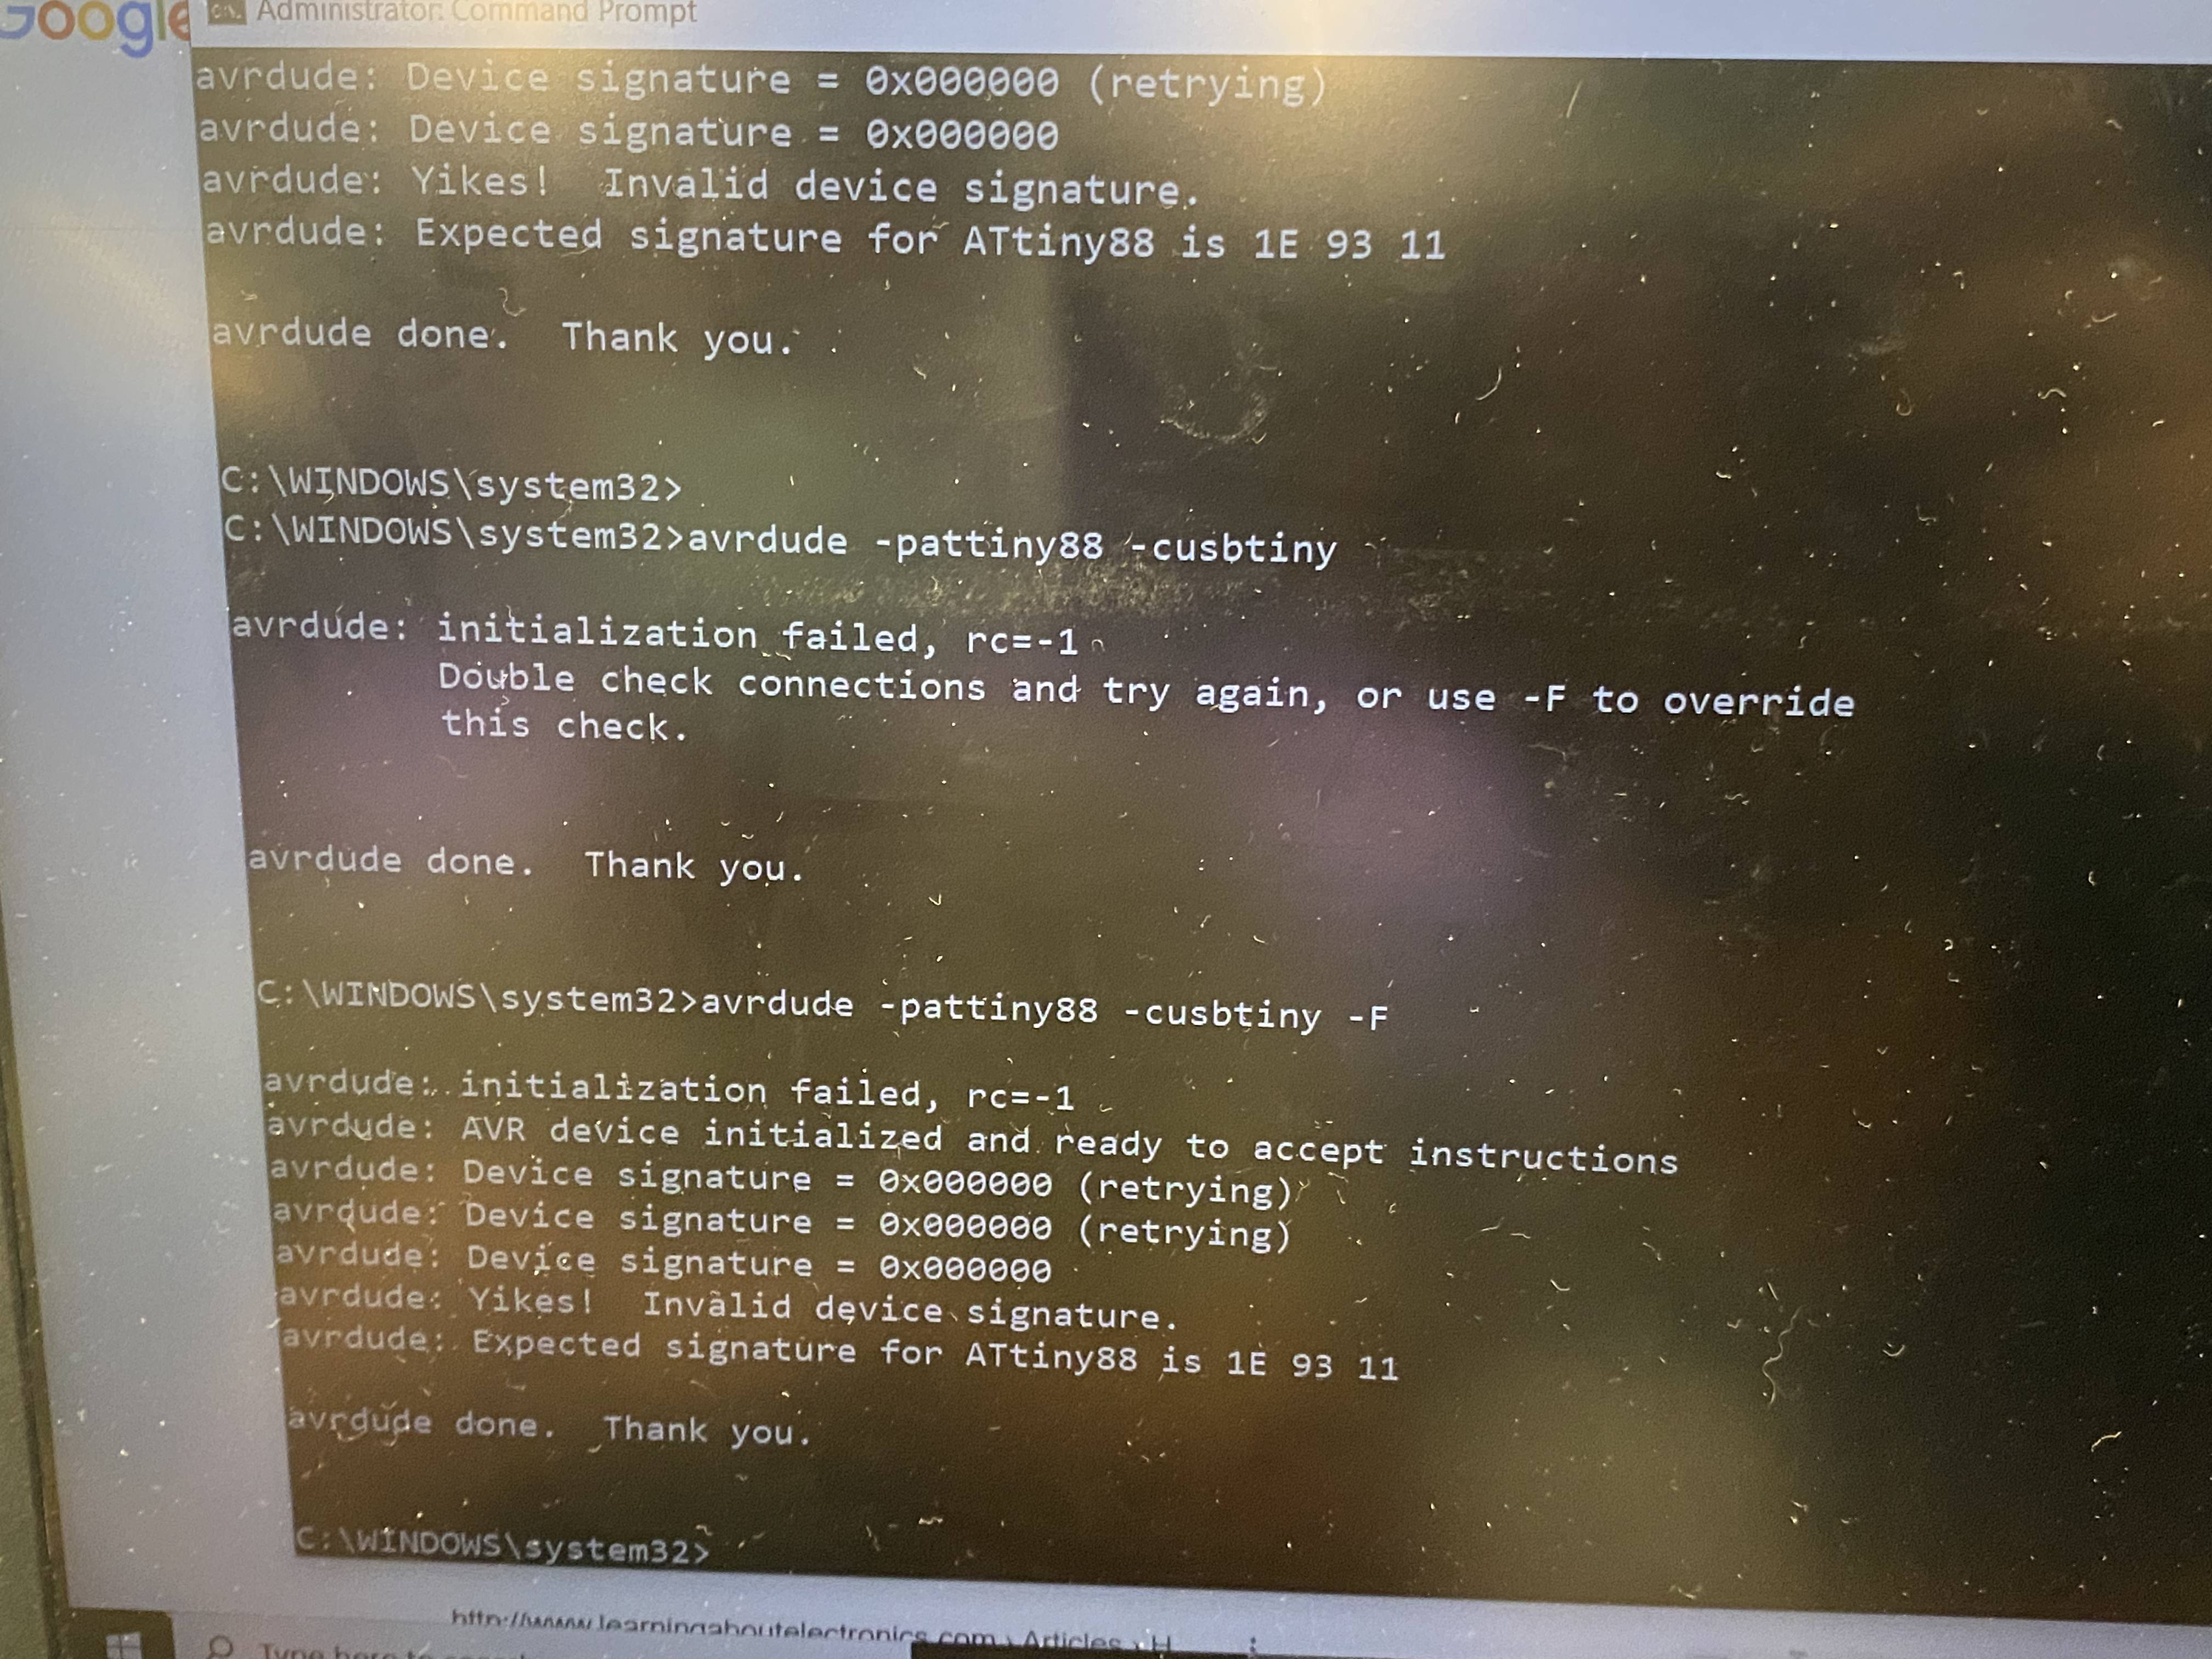
Some issues I had found was that the ATTINY88 chips I had bought from China were all faulty, thus all were not able to be connected.
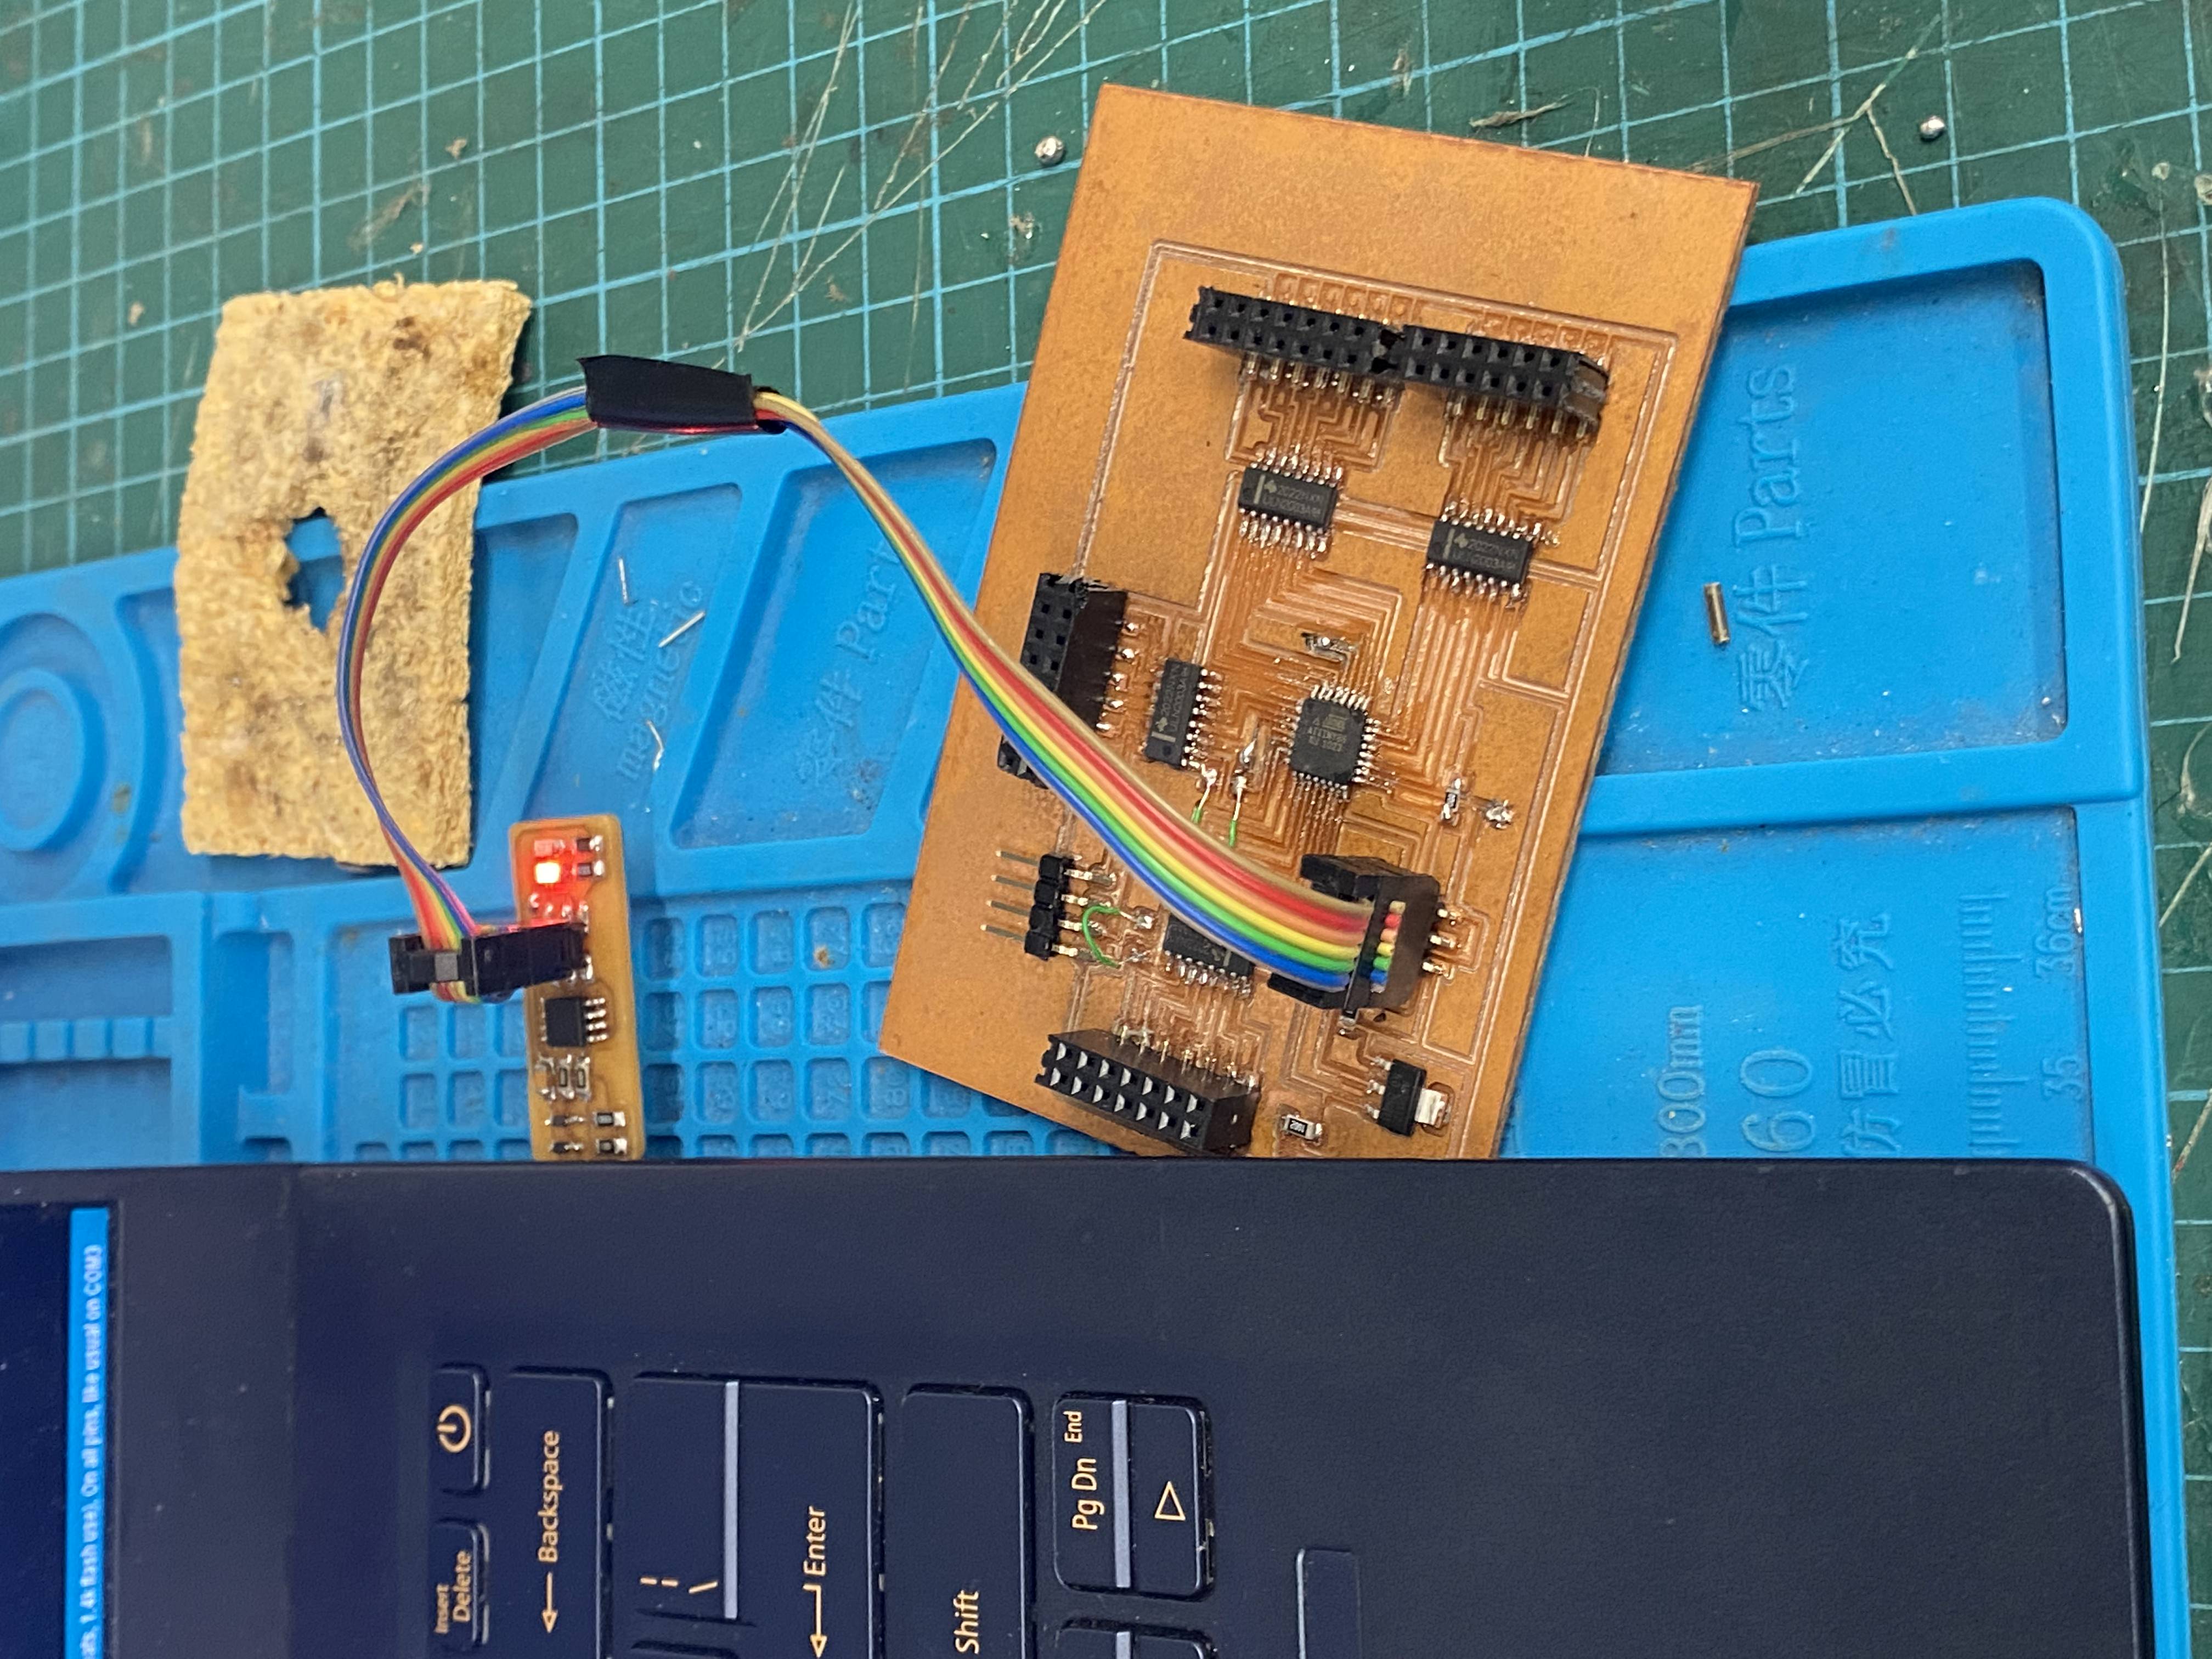
Using Avrdude to double check the signal sent by the chip, it displays no power and the chip still did not connect.
Thus I had made a new downscaled board using the ATTINNY1614, focusing on a proof of concept with 3 solenoids.
However, the solenoids that I had bought had wrong ratings, using 1.2A current over the labeled 300mA.
The ULN2003N chip could only suppport 500mA, so a 1.2A current would not run through it.
During the process of testing the board using a DC variable powersupply, I overvolted the board, resulting in frying the ATTINY1614 chip.

At the end, I have used an Arduino Uno as a proof of concept board.
Wiring format for a solenoid:

Using a 12v relay to test concept of using relays to run the high current requirment.
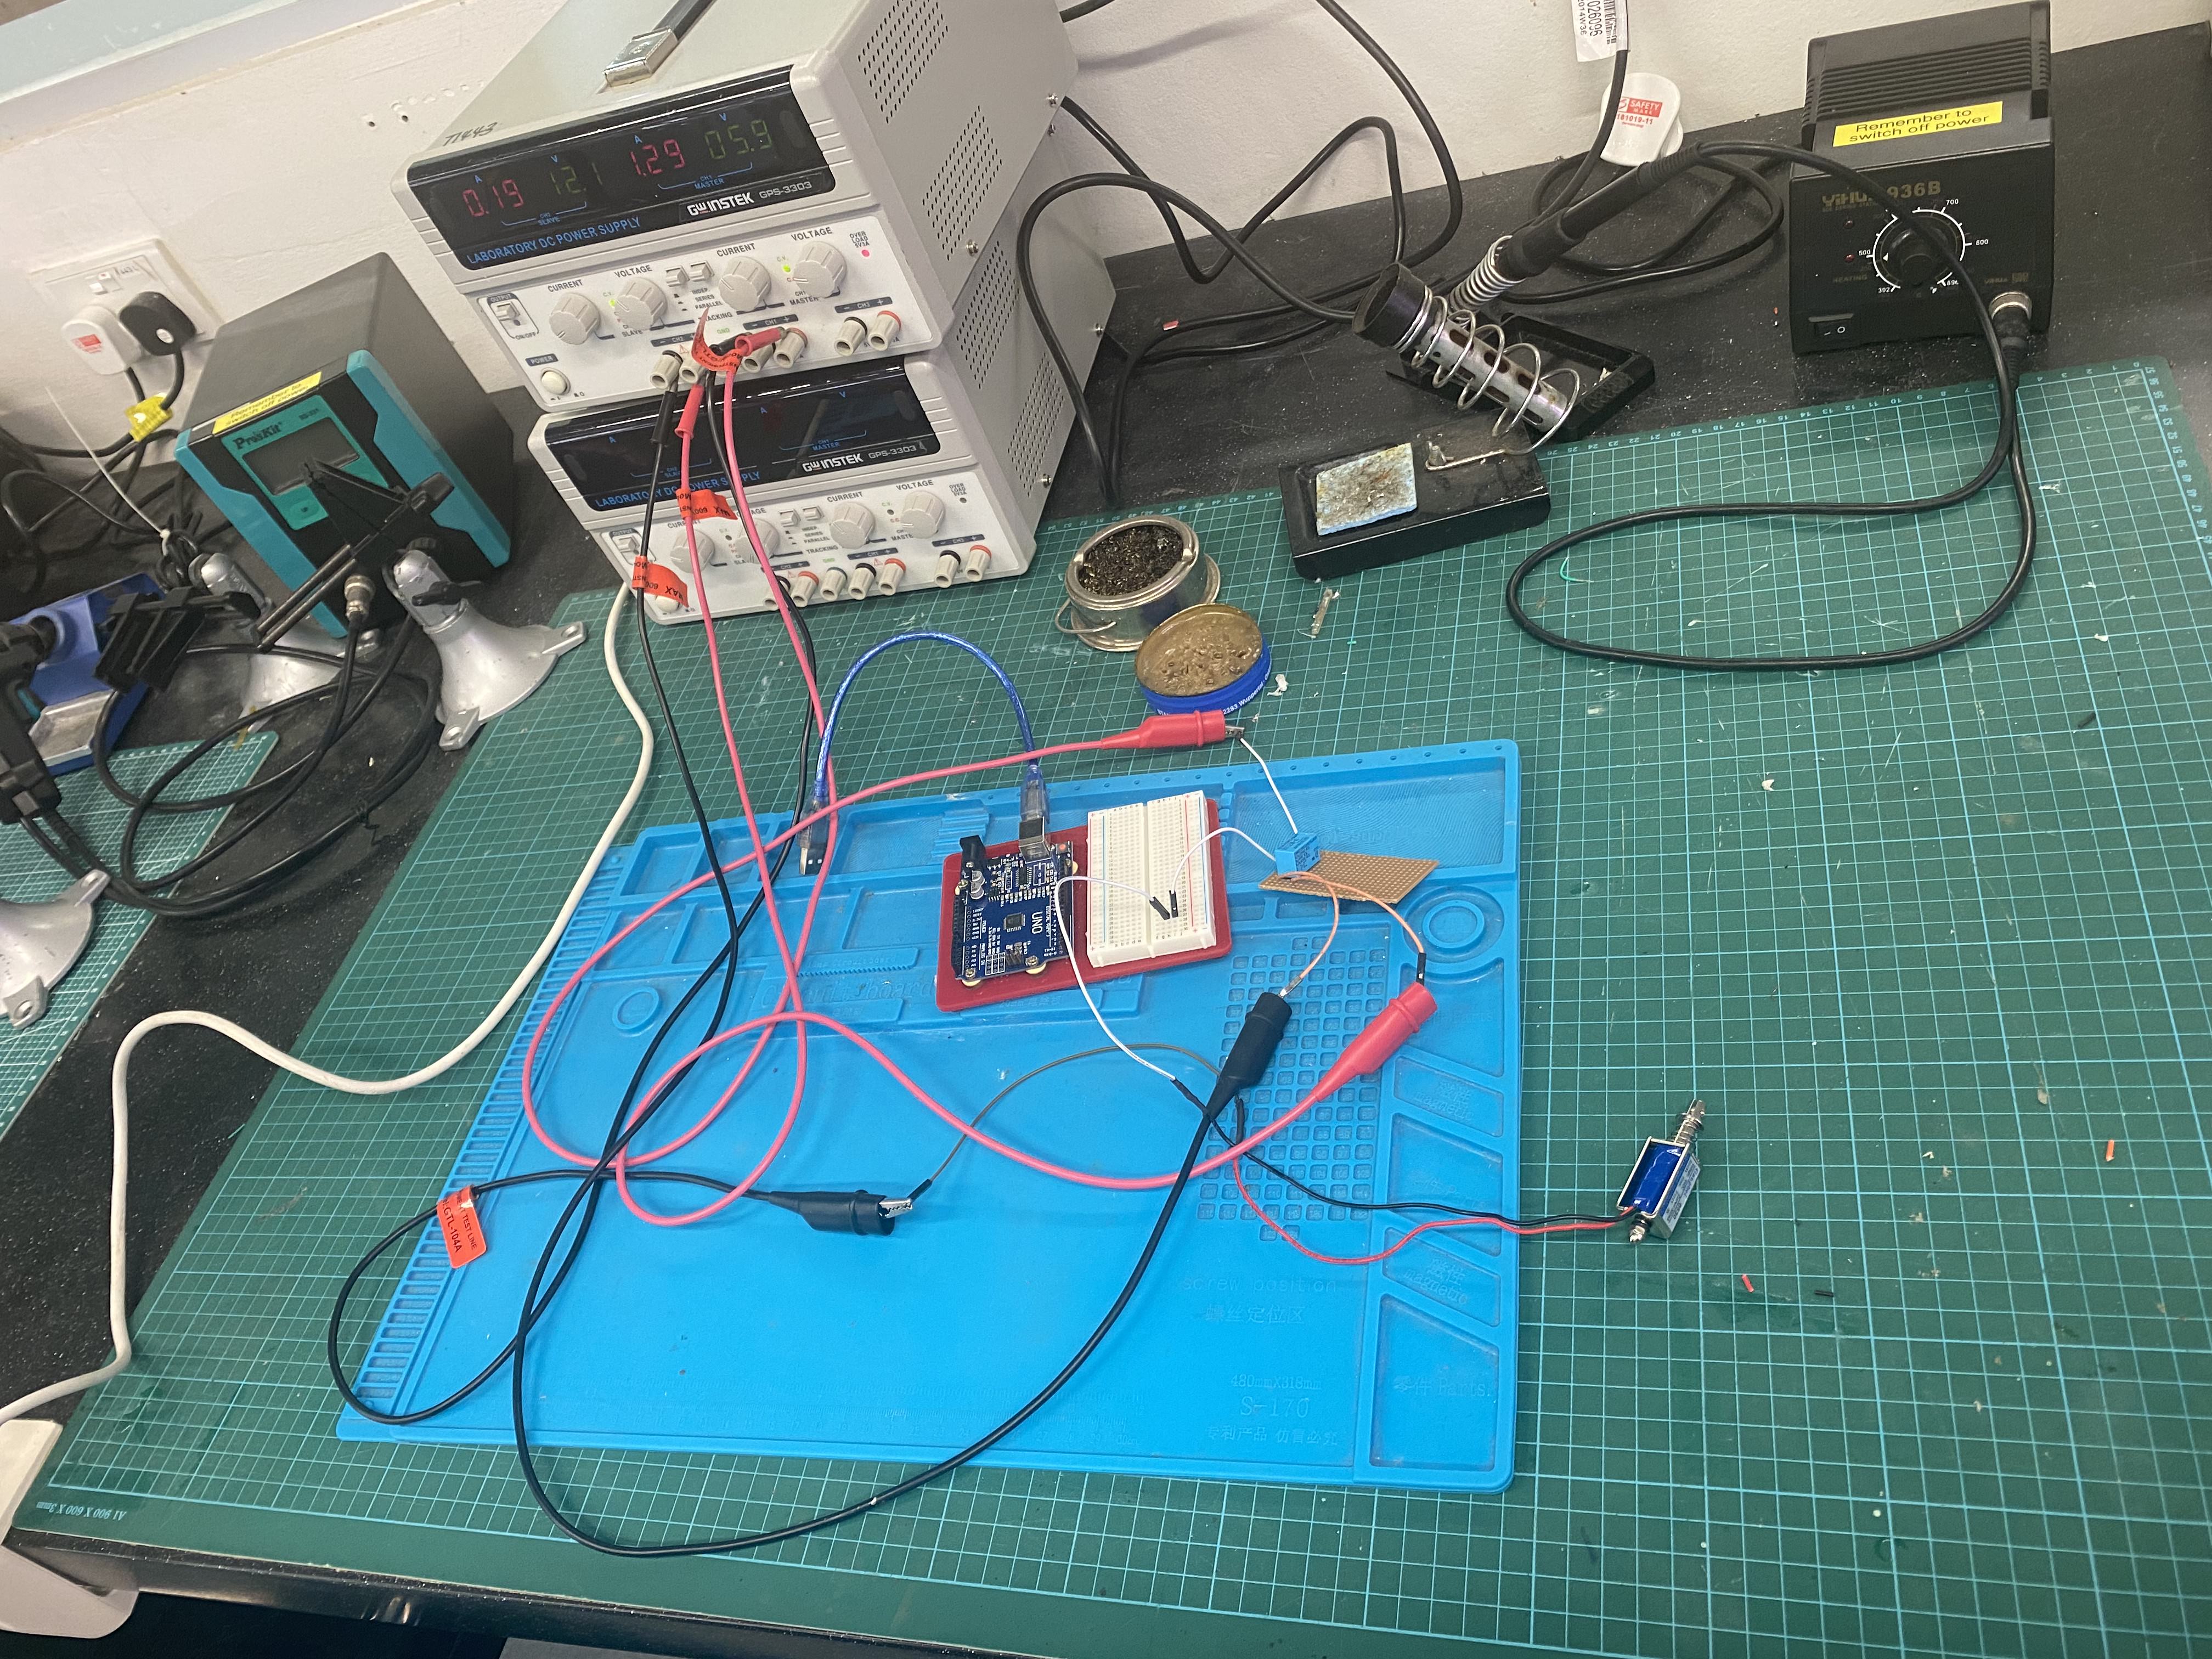
Using 3 5v relays to run into the arduino to run 1.2A current to power the solenoid.